Battle of Bir el Abd
| Battle of Bir el Abd (the Abd well) | |||||||
|---|---|---|---|---|---|---|---|
| Part of the Middle Eastern theatre of the First World War | |||||||
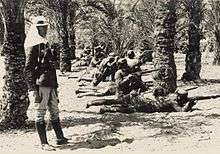
 Australian light horse patrol in Egypt | |||||||
| |||||||
| Belligerents | |||||||
|
|
| ||||||
| Commanders and leaders | |||||||
|
|
| ||||||
| Units involved | |||||||
|
ANZAC Mounted Division 5th Mounted Brigade |
39th Infantry Regiment 603rd Machine-Gun Company 606th Machine-Gun Company Mountain Artillery Battery Engineer Company | ||||||
The Battle of Bir el Abd or the Abd well (9 August 1916) was fought between the forces of the British Empire and the Ottoman Turkish Empire, during the Sinai and Palestine Campaign of the First World War.
The battle took place in the Sinai Desert following the British victory at the battle of Romani (3–5 August). The British Empire's ANZAC Mounted Division, with the 5th Mounted Brigade under command, was tasked to follow a retiring Turkish Army force. British patrols discovered them on 8 August and the remainder of the ANZAC Division got into a position to attack the next day. The assault was launched on early 9 August and became a day of attack and counter-attack. Finally in the early evening Chauvel, commanding the ANZAC Division, ordered his troops to withdraw leaving the Turkish force in command of the battle ground.[nb 1]
Battle
Advance to contact
Victory in the battle of Romani had exhausted the ANZAC Mounted Division, and the two units most heavily involved, the 1st and 2nd Light Horse Brigades, were sent to rest at Romani and Etmaler. While the rest of the division, with the 5th Mounted Brigade under command, were ordered to follow the withdrawing Turkish force. When they had advanced across the Sinai Desert, the Turkish force had constructed strong defensive positions. That they now made use of as they withdrew back east towards the Egyptian-Palestinian border.[3][4]
On 7 August the New Zealand Mounted Rifles Brigade leading the divisions pursuit of the Turkish force, located their rearguard at Oghratina. Attempting to turn their left flank, they found the opposition too strong for them and withdrew.[3] Early the next day reconnaissance patrols found the rearguard had pulled out during the night. The patrols continued their reconnaissance and located the Turkish force again, establish on the high ground to the east of Bir ed Abd. Around twenty-two miles (35 km) east of Romani on the road to El Arish.[3][5][6] That night the division headquarters, the 5th Mounted and New Zealand Brigades, camped at Oghratina. Waiting for the 1st and 2nd Brigades to rejoin them. But both brigades were short on manpower and had to form a composite brigade out of the two units.[5] On 9 August the division advanced again. With the New Zealand Brigade in the centre. The Composite Brigade to their left and the 3rd Light Horse Brigade on the right. The Turkish rearguard was encountered again holding a front of ten miles (16 km) across falling back on Bir el Abd.[3][4] The Composite Brigade were to make for a position two miles (3.2 km) to the north-east of the Turkish defences. The New Zealand Brigade were to advance directly at the position. The 3rd Light Horse Brigade would stay in contact with the New Zealanders, then move behind the Turkish position, and locate around five miles (8.0 km) to the east of it, hindering any withdrawal and compromise their lines of communications. While the 5th Mounted Brigade would form the reserve.[5]
Bir el Abd
The Turkish position at Bir el Abd, consisted of well constructed trenches and redoubts. That looked down on the approach routes, that any British force would use.[7] They had used the time since arriving well, recovering from their defeat in the previous days, to replenish their supplies and had been reinforced. So that the Turkish force now numbered around 6,000 men, twice the number available to Chauvel. They were also well supported by mountain artillery and howitzers.[8] The machine-guns were manned by German soldiers and the artillery by Austrians.[9]

The New Zealand advance began at 04:00, at the same time the 3rd Brigade made towards a redoubt over two miles (3.2 km) to the south. It was not for another hour that the Composite Brigade set out, but they located a trench system from the well to Lake Bardawil.[10] The ANZAC Division advanced through Turkish artillery and machine gun fire, until it got so heavy that it threatened the safety of their horses. Dismounting they continued on foot. However they were not advancing in one continuous line. There was a gap around 800 yards (730 m) between the New Zealanders and the depleted Composite Brigade and around one mile (1.6 km) between the 3rd Brigade and the New Zealanders.[11] By 05:00 that the New Zealand Brigade had reached a high point that overlooked the well and the Turkish position. An hour later the Turkish troops, left their trenches fixed bayonets and counter-attacked the New Zealand Brigade in two columns.[3][11] This first assault faltered in the face of the New Zealanders machine-gun and supporting artillery fire from the Somerset Battery, Royal Horse Artillery. The respite lasted for thirty minutes when the Turkish troops attacked the New Zealanders again. Then the Composite Brigade, which was still advancing, came under fire from artillery, anti-aircraft and machine-guns, was halted around 800 yards (730 m) from the Turkish lines. By 07:00 the Turkish had discovered the gap in the ANZAC Division line between the New Zealanders and the Composite Brigades and were trying to exploit it.[11] An hour later on the southern flank the 3rd Brigade advance was halted and they were ordered to change their direction of advance towards Ard, instead of trying to circle it. At the same time closing the gap between them and the New Zealanders.[8][12] The New Zealand Brigade advanced again, and at one stage it seemed like two of their regiments, may succeed in breaking into the Turkish position. But elsewhere in the north and south the brigades had been fought to a standstill. Turkish artillery fire intensified and at 10:30 Chavaul asked for air support to help locate their batteries. Part of the problem being they were a larger calibre than the British guns and were out-ranging them. At the same time he sent one of his reserve regiments the Warwickshire Yeomanry to support the Composite Brigade.[8]

By 11:30 the ANZAC Division was deployed in a crescent around three miles (4.8 km) the Turkish position and could observe the Turkish camel transports leaving to the east.[8] But thirty minutes later the Turkish troops counter-attacked along the length of their line. One of their artillery shells landed on a limber from the Aryshire Battery, Royal Horse Artillery killing four men, wounding several others and killed thirty-seven horse. The Turkish soldiers were now advancing in waves towards the New Zealand Brigade. But supported by their artillery they managed to drive them back. The Composite Brigade was the Turkish next target. The Warwickshire Yeomanry, reinforcing them, had to fight off three battalions by themselves. The 3rd Brigade also being attacked, informed Chauval that there was little chance of them being able to break through the Turkish lines.[13][14] Back in the north the Composite Brigade by 14:00 was being forced back and the Ayrshire Battery supporting them was in danger of being overrun. Chauvel committed his last reserves here to shore up the position and they managed to withdraw the guns. All along the ANZACs front they were now pulling back.[13] The ANZAC Division held on for the next two hours, slowly retiring to the rear. Realising the opportunity presented to them the Turkish artillery increased their rate of fire. To counter this the ANZAC Divisions squadrons rode forward, until the rate of fire forced them to dismount then tried attacking on foot. Until 15:00 when Chauvel order the division to attack but little progress was made.[15][16] At 16:30 in the north between 2–3,000 men attacked the Composite Brigade, getting to within a "few hundred yards of the ANZAC Divisions lines. To the right the New Zealand Brigade was now exposed the two flanking brigades having retired further to the rear and their position was being enfiladed from both sides.[17] Then at 17:00 the Turkish force counter-attacked in force and the ANZAC Division was forced to withdraw. One squadron of the 9th Light Horse Regiment, trying to recover their wounded, waited until they were within fifty yards (46 m) before leaving and were forced to leave three of their wounded behind.[15] Until at 17:30, with the danger of a hand to hand fight looming, Chauvel was forced to order a "general withdrawal". When the Turkish realised what was happening, they increased their efforts to break through the divisions front. The ANZAC Division withdrew by bounds, squadrons leap-frogging each other. First to their horse lines and then rode back to safety.[17]
Aftermath
The Turkish regiment had shown the ANZAC Division they were still a force to be reckoned with. Turning their attack into defence and then driving them off. The ANZAC casualties were seventy-three dead, 243 wounded and six missing.[18] Turkish casualties for this battle are not known, but altogether they had lost more than half of the 18,000 man force in their advance, into the Sinai.[19] It was intended for the ANZAC Division to camp that night close by, with the intention of shadowing the Turkish force the next day, if they withdrew. However Chauvel withdrew the division except for some observation posts left behind, all the way back to Oghratina.[18][9] Reconnaissance patrols on the 10 August reported that the Turkish still occupied the area of the well. Then early the next day a New Zealand patrol reported the Turkish had evacuated the position and were at Salama. The remainder of the ANZAC Division advanced to contact with the Turkish force, but both sides only engaged in long range artillery and rifle fire. That night the Turkish force, broke off contact and retired to El Arish.[20][9]
References
- Footnotes
- ↑ At the time of the First World War, the modern Turkish state did not exist, and instead it was part of the Ottoman Turkish Empire. While the terms have distinct historical meanings, within many English-language sources the term "Turkey" and "Ottoman Empire" are used synonymously, although many academic sources differ in their approaches.[2] The sources used in this article predominately use the term "Turkey". .
- Citations
- ↑ "Battle of Romani". The Long Long Trail. Retrieved 27 October 2013.
- ↑ Fewster, Basarin, Basarin 2003, pp.xi–xii
- 1 2 3 4 5 Powles, p.35
- 1 2 Wilkie, p.102
- 1 2 3 Gullet, p.176
- ↑ Wilie, p.102
- ↑ Gullet, pp.176–177
- 1 2 3 4 Gullet, p.177
- 1 2 3 Wilkie, p.105
- ↑ Gullet, pp.177–178
- 1 2 3 Gullet, p.178
- ↑ Wilkie, p.103
- 1 2 Gullet, p.181
- ↑ Wilkie, pp.103–104
- 1 2 Gullet, p.182
- ↑ Wilkie, p.104
- 1 2 Gullet, p.183
- 1 2 Gullet, p.184
- ↑ Gullet, p.186
- ↑ Gullet, pp.185–186
- Bibliography
- Fewster, Kevin; Basarin, Vecihi; Basarin, Hatice Hurmuz (2003). Gallipoli: The Turkish Story. Crows Nest, New South Wales: Allen and Unwin. ISBN 1-74114-045-5.
- Gullett, Henry Somer (1923). The Australian Imperial Force in Sinai and Palestine, 1914–1918. Official History of Australia in the War of 1914–1918. Volume VII. Sydney: Angus and Robertson. OCLC 59863829.
- Powles, Guy (1922). The New Zealanders in Sinai and Palestine. Auckland: Witcombe and Toombs. ISBN 9781843426530.
- Wilkie, Alexander Herbert (1924). Official War History of the Wellington Mounted Rifles Regiment 1914–1919. Auckland: Whitcombe and Tombs. ISBN 9781843427964.