Operation Clipper
| Operation Clipper | |||||||
|---|---|---|---|---|---|---|---|
| Part of World War II | |||||||
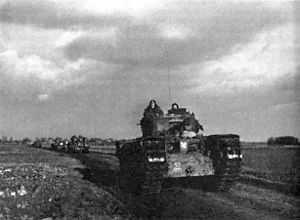
 Column of British tanks near Geilenkirchen | |||||||
| |||||||
| Belligerents | |||||||
|
|
| ||||||
| Commanders and leaders | |||||||
|
|
| ||||||
| Casualties and losses | |||||||
|
| |||||||
| ||||||
During the Second World War, Operation Clipper was an Allied offensive by British XXX Corps (which included the U.S. 84th Infantry Division) to reduce the Geilenkirchen salient in mid-November 1944. Clipper was a part of a wider Allied operation, named Operation Queen to gain control of the Roer valley and the Hürtgen Forest.
Geilenkirchen is situated on the Wurm river, some 20 km (12 mi) north of Aachen. The surrounding area is undulating, alternating between woodland, farmland and industrial villages. The area was crossed by a network of passable minor roads, some major roads and a railway line. The Wurm is the major geographic feature.[1]
The salient was a German position on the Siegfried Line (or Westwall) at the boundary between the British 2nd Army and the U.S. 9th Army. It was a restriction to the movement of Allied forces and a potential threat.
The plan
Anglo-American cooperation was prompted by the availability of British artillery and specialised armour (such as flail and flame-throwing tanks). A two-pronged attack was planned on the salient and the temporary attachment of the 84th Infantry Division to XXX Corps, avoided problems of divided command.[2]
The operation was planned to take four phases. First, on 18 November the U.S. 84th Division—commanded by Major General Alexander R. Bolling—would pass through the troops manning the frontline, advance north-east 2 mi (3.2 km) and take Prummern and the surrounding high ground, east of Geilenkirchen. Second, at midday, the British 43rd (Wessex) Division—commanded by Major-General Ivor Thomas—was to advance and capture the high ground north and west of the town (around Bauchem and Tripsrath). Once done, Geilenkirchen would be virtually encircled, and the 84th Division would occupy the town and its north-eastern suburbs (third phase) before, in the fourth phase, both divisions would advance north-east about 3 mi (4.8 km), clearing both sides of the Wurm. The final objectives were the villages of Hoven, Müllendorf, Würm and Beeck.[3][4]
The defences
The German defenders consisted of the bulk of 176th Division, northwest of Geilenkirchen and the 183rd Volksgrenadier Division, in the town and southeast of it. General der Infantrie Günther Blumentritt—commander of the XII SS Corps—had placed the bulk of his artillery in the area.[5]
South-east of Geilenkirchen, deep minefields had been laid from Geilenkirchen to Jülich, via Immendorf and Puffendorf, about 10 km (6.2 mi). The area was at the point where a new section of the Westwall, built while Aachen held out, joined the established defences. Westwall used the compact, stone-built buildings in the villages, which had been fortified, and purpose-built concrete bunkers.[5]
The attack
Opening moves
At 06:00, before dawn, on 18 November, giant searchlights ("canal defence lights") of the 357th Searchlight Battery, Royal Artillery provided hazy indirect light for the mine-clearing flail tanks supporting the infantry. These tanks moved toward the German mine field between Geilenkirchen and Immendorf, but, on the wet ground, mud lessened the flails′ effectiveness and so engineers followed with mine detectors.[6]
After a brief artillery bombardment, the 334th Infantry Regiment advanced through the cleared strips at 07:00 and easily secured the high ground east of Geilenkirchen. The right flank gave some concern to U.S. commanders as a counter-attack was expected and fresh German troops appeared to be in the area; the advance to Prummern was delayed until the flank was secured. When the attack resumed, supported by British Sherman tanks, there was steady progress and the regiment′s objectives were achieved by late afternoon.[7]
The British attack north and west of the town also achieved its objectives by nightfall. The Worcestershire Regiment advanced on Tripsrath, capturing its intermediate objectives of Rischden and intervening woods with little opposition and few casualties. The preparatory bombardment had reduced the Germans′ will to resist and rain had exposed much of the minefields. The rain, however, also made it difficult to bring up-armoured support, anti-tank guns and supplies. An unsupported British advance on a copse—using universal carriers—was engaged by two self-propelled guns and forced back, with heavy casualties.[4]
Despite further counter-attacks and "friendly fire" casualties, the Worcestershires occupied Tripsrath after dark, aided by artillery, and held most of the village sometimes with Germans as next-door neighbours.[4]
Increased resistance
Given the first day′s success, XXX Corps′ commander—Lieutenant General Brian Horrocks—directed that the last two phases—3 and 4—should be combined on the 19th. In order to facilitate this, the U.S. 84th continued its advance toward Süggerath, instead of consolidating overnight. A reconnaissance patrol toward Beeck, however, reported an impending German counter-attack on Prummern by two companies of the 9th Panzer Division′s 10th Panzergrenadier Regiment, with six tanks. The night attack was fought off, but the American advance toward Beeck was delayed until just before dawn on the 19th.[8] Resistance in Prummern continued until 20 November, when it was finally cleared with the support of British "Crocodile" flame-throwing tanks: the adjacent high ground, "Mahogany Hill", which had held out for two days, was finally captured by an American surprise attack on 22 November.[9]
On the 19th, the Worcestershires had been denied supply and support by the lack of a usable supply route, but they fought off a counter-attack by the 104th Panzer Grenadier Regiment of the 15th Panzergrenadier Division. Five Shermans of the 4th/7th Royal Dragoon Guards—equipped for traversing mud—arrived, but four were almost immediately knocked out by artillery and a Panzerfaust. A second German attack, on Rischden, this time supported by two Tigers and two self-propelled guns, was engaged by PIATs, anti-tank guns and tanks that had arrived and by flanking fire from Tripsrath and it was beaten off with severe losses [for whom?].[4]
Events in the Prummern area had made American commanders cautious, particularly as there was now a gap in the American line between the 84th Division and the 2nd U.S. Armored Division 1.5 mi (2.4 km) distant at Apweiler. This was plugged by the temporary attachment of the 405th Infantry Regiment.[10]
Geilenkirchen captured
Geilenkirchen itself was subdued relatively easily by the 333rd Infantry Regiment on 19 November, but the Allied advance suffered from the lack of artillery support which had been held back by the fear of friendly fire incidents, as had occurred earlier in the British sector. Two troops of tanks from the British Sherwood Rangers Yeomanry provided close support, although they could not make up entirely for lack of artillery. From Geilenkirchen, the advance continued northeast along the Wurm toward Süggerath. Flame-throwing Crocodiles subdued the increasing German resistance, especially two pillboxes guarding the road into Süggerath. "A few squirts from the flame-throwers, and the Germans poured out ... The bastards are afraid of those flame-throwers and won’t be caught inside a pillbox ...", said one U.S. company commander.[11]

The capture of Geilenkirchen opened a supply route to Tripsrath. German artillery heavily bombarded Tripsrath for the next four days, but, sheltering in basements, the British infantry suffered few losses.[4] On the other hand, German defenders of the neighbouring hamlet of Bauchem were subdued by a ferociously effective and uniquely concentrated four hour artillery bombardment on the 20th, and advancing infantry occupied it with no effective resistance.[12]
The lead battalion of the 333rd passed through Süggerath, by-passing determined German strongholds. Augmented by a second, fresh battalion, Süggerath was cleared during the night of 19/20 November. The 333rd Infantry was still over a mile short of its final objective of Würm,[11] but there was the possibility of establishing a coherent frontline with XXX Corps on its left and 334th Infantry Regiment on its right.[13] The weather, however, intervened.
Rain intervenes
Intermittent showers were followed by a downpour on 21 November, turning the fields into mudbaths that rendered the tanks ineffective and vulnerable. The direct road to Würm was mined and an alternative side road was blocked by debris and could not be cleared until a bulldozer was used. The U.S. infantry attempted to advance but, without tanks, they were beaten back. When the British Crocodiles were able to advance and assault the defences, there was rapid progress, with defenders surrendering. The mud intervened again, however, bogging down the Crocodiles′ armoured trailers. Without their support, infantry attacks on Müllendorf failed, particularly as the German defences had been strengthened by the 15th Panzergrenadier Division.[14]
A flanking attack by the U.S. 405th Infantry Regiment toward Beeck on 22 November similarly bogged down against prepared defences. On the other side of the Wurm, British assaults were also beaten off by strengthened resistance.[15]
Operation ended
Despite the frustrations of 21-22 November, and the failure to capture the final objectives, the purpose of the operation had, in fact, now been achieved. The Geilenkirchen salient had been substantially removed and the U.S. XIII Corps now had room to manoevre. The 84th Infantry Division reverted to U.S. command and further attacks were abandoned on the 23rd.[15]
On 23 November, the Worcestershires were relieved by 5th Wiltshires, who had been holding the village of Birgden for the last 12 days. This was welcome for the Worcester men who had suffered continuous shelling in their forward positions in Tripsrath and Rischden.[4]
Order of battle
Allied
British XXX Corps
- British 214 Infantry Brigade (assigned to the 43rd Infantry Division)
- 7th Battalion, Somerset Light Infantry (attacking Niederheid)
- 1st Battalion, Worcestershire Regiment (attacking Tripsrath and Rischden)
- 5th Battalion, Duke of Cornwall's Light Infantry (attacking Hochheid)
- 5th Battalion, Dorset Regiment (detached from 130 Brigade) (attacking Bauchem)
- 4th/7th Royal Dragoon Guards
- U.S. 84th Infantry Division
- 333rd Infantry Regiment (attacking Geilenkirchen and Sueggerath)
- Sherwood Rangers (British)[4]
- 334th Infantry Regiment (attacking Prummern and Beeck)
- Drewforce, two troops of flail and flame-throwing tanks (British)
- one troop of 357th Searchlight Battery, Royal Artillery (British)
- 405th Infantry Regiment (detached from 102nd Infantry Division) (attacking Beeck)
- 333rd Infantry Regiment (attacking Geilenkirchen and Sueggerath)
German
XII SS Corps
- 176th Infantry Division
- 1218th Grenadier Regiment
- 1219th Grenadier Regiment
- 1220th Grenadier Regiment
- 183rd Volksgrenadier Division
- 330th Volksgrenadier Regiment
- 343rd Volksgrenadier Regiment
- 351st Volksgrenadier Regiment
- 104th Panzergrenadier Regiment (part of the 15th PG Division)
- 10th Panzergrenadier Regiment (part of the 9th Panzer Division)
References
- Citations
- ↑ U.S. History, pp545-546
- ↑ U.S. History, p545
- ↑ U.S. History, p546
- ↑ 4.0 4.1 4.2 4.3 4.4 4.5 4.6 "The Battle for Tripsrath". Worcestershire Regiment. Retrieved 22 Jan 2010.
- ↑ 5.0 5.1 U.S. History, p548
- ↑ U.S. History, p550
- ↑ U.S. History, pp550-551
- ↑ U.S. History, pp551-552
- ↑ U.S. History, pp552-553
- ↑ U.S. History, pp553-554
- ↑ 11.0 11.1 U.S. History, pp554
- ↑ Hart, Stephen Ashley (2000). Montgomery and "colossal cracks": the 21st Army Group in northwest Europe. Greenwood Press. p. 95. ISBN 0-275-96162-1.
- ↑ U.S. History, pp555
- ↑ U.S. History, pp555-556
- ↑ 15.0 15.1 U.S. History, pp556
- Bibliography
- MacDonald, Charles B. (1990) [1963]. "Chapter XXIII: The Geilenkirchen Salient". United States Army Center of Military History. CMH Pub 7-7-1. Retrieved 22 Jan 2010. Missing or empty
|title=(help)
- "The Battle for Tripsrath". Worcestershire Regiment. Retrieved 22 Jan 2010.
- Wilmot, Chester (997). The Struggle for Europe. Ware, UK: Wordsworth Editions Ltd. pp. 566–568. ISBN 1-85326-677-9.
| Wikimedia Commons has media related to Operation Clipper. |