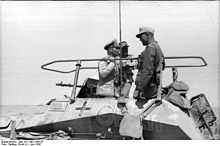
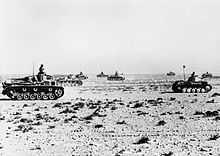
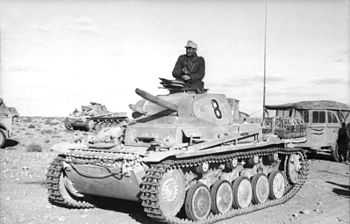
Operation Battleaxe
| Operation Battleaxe | |||||||
|---|---|---|---|---|---|---|---|
| Part of the Western Desert Campaign of the Second World War | |||||||
 Soldiers of the 4th Indian Division decorate the side of their lorry "Khyber Pass to Hell-Fire Pass". | |||||||
| |||||||
| Belligerents | |||||||
|
| ||||||
| Commanders and leaders | |||||||
|
Archibald Wavell Noel Beresford-Peirse Arthur Coningham | Erwin Rommel | ||||||
| Strength | |||||||
|
25,000 men[nb 1] ~190 tanks[nb 2] |
~678 casualties[nb 7] 10 aircraft[2] | ||||||
| ||||||
Operation Battleaxe[nb 9] was a British Army operation during the Second World War in June 1941 with the goal of clearing eastern Cyrenaica of German and Italian forces; one of the main benefits of this would have been the lifting of the Siege of Tobruk.
It was the first time during the war that a significant German force fought on the defensive.[9] The operation did not succeed though, as British forces launched their initial assaults against strong defensive positions created by German General Erwin Rommel. The British lost over half of their tanks on the first day and only achieved victory at one of their three thrusts. They achieved mixed results on the second day, being pushed back on their western flank, but repelled a significant German counter-attack in their centre. On the third day, the British narrowly avoided outright disaster by withdrawing just ahead of a German encircling movement which would have cut them off from retreat.
The failure of this operation led to the replacement of British General Archibald Wavell, Commander-in-Chief of the Middle East, by Claude Auchinleck.
Background
Events leading up to Battleaxe
In late March 1941, soon after the arrival of German forces (the Afrika Korps) in Tripoli, Libya to reinforce the Italians, their commander (General Erwin Rommel)—although ordered to remain on the defensive—quickly captured the British front line position at El Agheila. He then went on an offensive which, by mid-April, had reached as far as Sallum, Egypt. The sole remaining Allied position in Libya was the heavily fortified port of Tobruk, which Rommel had surrounded and placed under siege. The Allied response was restricted primarily to harassment by the Royal Air Force.[nb 10]
Having been informed by General Wavell that the Western Desert Force was vastly inferior to the Axis forces now in Africa, Churchill ordered that a convoy of tanks and Hawker Hurricanes, Convoy WS 58 (codenamed Tiger) [nb 11], be sailed through the Mediterranean instead of having it sail around the Cape of Good Hope; a move that would save 40 days of sailing.[12] The German Armed Forces High Command (Oberkommando der Wehrmacht)—also concerned by Rommel′s actions—sent General Friedrich Paulus to Africa to investigate the situation.
On 12 May, the Tiger convoy arrived in Alexandria[13] carrying 238 tanks[nb 12] and 43 Hurricanes.[15] A total of 57 tanks and 10 Hurricanes had been lost when the Empire Song struck a mine in the Mediterranean; although the crew was saved.[16] There were delays in unloading the tanks, which also had to be modified for desert warfare and given necessary overhauls, which meant that the earliest day for Battleaxe to be launched was pushed back to 10 June.[17] These tanks were intended for the rebuilding of the 7th Armoured Division, which had been out of action since February as the division was essentially tankless after losing most of its tanks to wear and tear during Operation Compass. Following Compass, many of the division′s personnel had been dispersed to other tasks, meaning the division would also have to be fully reorganized and retrained to become battle ready.[18]
Also on 12 May General Paulus, after witnessing one of Rommel's failed attempts to assault Tobruk, sent a report to OKW describing Rommel's position as weak, with critical shortages of both fuel and ammunition.[10] In response to this and with the imminent invasion of the Soviet Union, Field Marshal Walther von Brauchitsch—the Commander-in-Chief of the German Army—ordered Rommel not to advance further or attack Tobruk again; he was ordered to hold his position and conserve his forces.
Through Ultra intercepts, the British also received Paulus′ report[10] and Churchill, believing that one strong push would dislodge German forces, began to increase the pressure on General Wavell to immediately go on the offensive.[10] Wavell quickly prepared Operation Brevity, a limited operation with the intention of seizing Sollum, the Halfaya Pass, and Fort Capuzzo, then continuing to advance on to Sidi Aziez and towards Tobruk as far as supply would allow while not risking the forces committed; its objective was to destroy as much Axis equipment as possible[11] and secure a foothold for the larger Operation Battleaxe to be launched from once the new tanks were made available.[19] Brevity began on 15 May and looked initially successful, with Fort Capuzzo and Halfaya Pass being captured. However, the following day William Gott, concerned that his 22nd Guards Brigade would be wiped out if caught in the open ground should the Germans attack with tanks, decided to pull almost the entire force back to Halfaya Pass and the operation officially ended on the 17th with only the Halfaya Pass captured;[20] The pass itself was retaken by a small German force on 27 May[21] during an operation codenamed Skorpion.
By the end of May, the Greek island of Crete had fallen to the Germans. This meant that the German air force would have additional airfields available to threaten Allied shipping and also to protect their own supply convoys and troops in Cyrenaica; delaying Battleaxe could therefore mean facing stronger Axis opposition.[22] To offset this, the British Chiefs of Staff stated that it was imperative that control be wrested in the area between Sollum and Derna and British air forces in that region be re-established.[19]
Allied plans

On 28 May, Wavell gave his orders for the final plan for Operation Battleaxe.[nb 13] It was to consist of three stages: in the first the enemy was to be defeated on the frontier and the area encompassing Halfaya, Sollum, Capuzzo and Sidi Aziez was to be secured. In the second, the XIII Corps was to push up and secure the area around Tobruk and El Adem. Once this was complete, then the areas of Derna and Mechili were to captured.[19]
In the initial stage, the British forces would advance in a three-prong assault to clear the frontier region. In the centre and along the coast were two groups, "Coast Force" and "Escarpment Force". The former was responsible for capturing Halfaya Pass,[23] while the latter was to capture the remainder of the frontier, namely Fort Capuzzo, Musaid and Sollum. The "7th Armoured Brigade Group"—backed by artillery provided by its Support Group—was tasked with engaging and destroying Rommel′s panzers, which were thought to be located at Hafid Ridge;[24] in doing so, they would also have encircled any Axis units on the frontier between themselves and the remainder of the British forces.[25]
After capturing the frontier, the brigades of the 7th Armoured Division would reform and continue on north to relieve Tobruk. Once joined by the Tobruk garrison, the combined forces would then press the offensive westwards, driving the Germans as far back as they could be pushed.
Leading the overall ground operation was Lieutenant-General Noel Beresford-Peirse, commander of the British XIII Corps (Western Desert Force). Major-General Frank Messervy commanded the Coast Force and Escarpment Force while Major-General Michael O'Moore Creagh would command the 7th Armoured Brigade Group and the Support Group.
Three days prior to the start of Battleaxe, to help soften the Axis forces, the Royal Air Force was to use their bombers to step up their attacks on Benghazi while all other aircraft capable of ground attacks were to focus on attacking enemy movement on the frontier.[10] Once the battle began, fighter aircraft were then to patrol defensively over Allied ground forces while medium bombers were to stand ready for assisting the Army in engaging enemy columns.[10] Such was the priority on Battleaxe, that Arthur Tedder—Air Officer Commander-in-Chief, Middle East—was instructed by the Chiefs of Staff to accept significant risks in other theatres by diverting all possible air support for it.[10]
Both Beresford-Peirse and Tedder would be headquartered well in the rear of the attack, at Sidi Barrani and Maaten Baggush respectively.[24] Beresford-Peirse chose Sidi Barrani as, even though it was more than a five-hour drive from the battlefield, it was not only equipped with the most advanced airfield for reconnaissance planes available, it was also the most forward position he could take while maintaining communications with the even more distant Maaten Baggush.[3]
This plan was based on Wavell′s intelligence information (which was poor due to shortages of proper equipment and trained pilots needed for photographic reconnaissance), which incorrectly indicated that 2/3 of the Germans′ tank strength was situated around Tobruk; this would have placed him at a decisive material advantage on the frontier region.[26]
The attack was scheduled originally to start on 7 June,[26] but this date was pushed back at the instance of General O'Moore Creagh whose squadrons had not received their tanks until 9 June. The new date was 15 June, giving Creagh just five days for additional training for his crews.[27]
Axis preparation
Though Brevity had failed to yield any territory to the British, it showed Rommel that his front line defences were quite easily capable of being breached. Anticipating further British assaults from Egypt, Rommel used the lessons he had learned from his ineffective attacks on Tobruk and proceeded to create a line of fortified positions from Halfaya to Sidi Azeiz,[28] placing a number of anti-tank guns and anti-tank mines on the Halfaya Pass, Point 206 (south of Forth Capuzzo) and on Point 208 (west of Fort Capuzzo on the Hafid Ridge). The primary responsibility of the frontier defence was charged to the 15th Panzer Division, which had recently received a new commander, General Walter Neumann-Silkow, on 8 June.[17]
A considerable boost for Rommel′s preparation came from weaknesses in the 7th Armoured Division′s signals security, giving Rommel nine hours advanced knowledge of the operation, including dispositions, concerns and intentions.[29] With this information, he placed the 5th Light Division to the south of Tobruk, ready to use it against either the Sollum area or on Tobruk itself depending on the situation. He also ordered a large artillery bombardment of Tobruk the night before the operation was to begin in order to prevent the Allied garrison from breaking out.[30]
Rommel′s primary concern was now more of a logistical nature:
| “ | Unfortunately, our petrol stocks were badly depleted, and it was with some anxiety that we contemplated the coming British attack, for we knew that our moves would be decided more by the petrol gauge than by tactical requirements.[31] | ” |
Forces involved
| British and Axis Orders of battle | Operation Battleaxe, 15–17 June 1941 | ||||
|---|---|---|---|---|
|
Allied forces The British forces were composed primarily of the 4th Indian Infantry Division (Major-General Frank Messervy), 7th Armoured Division (Major-General Sir Michael O'Moore Creagh) and 22nd Guards Brigade – all part of XIII Corps commanded by Lieutenant-General Noel Beresford-Peirse, who was also in charge of the overall land forces for Battleaxe. Both the 4th Indian Infantry Division and 7th Armoured Division were understrength. The 4th Indian Infantry Division only had one of its brigades, the 11th Indian Infantry Brigade, while its other two, the 5th Indian Infantry Brigade and the 7th Indian Infantry Brigade, were respectively in Syria and East Africa. To compensate, it had 22nd Guards Brigade and 7th Armoured Division′s 4th Armoured Brigade under command.[32] The 7th Armoured Division was at two brigades instead of its usual three, being composed of the 7th Armoured Brigade and 7th Support Group. 4th Armoured Brigade′s tank battalions were distributed between the Messervy′s Coast Force and Escarpment Force. For the initial phase of the battle the forces were divided between 7th Armoured Brigade Group, Escarpment Force, and the Coast Force as such:
In terms of aircraft, the ground forces would be supported by six fighter and eight bomber squadrons from the 204 Group Allied air forces.[26] Total British strength for the operation came to 25,000 men,[1] ~220 tanks (28 Light, 100 cruisers and 92 infantry tanks), 98 fighters and 105 bombers.[2] Of their cruiser tanks, 38 were older cruiser models (Mk I, II and III/IV) while 53 were the new Crusader models.[34] In order to give the Crusader and Matilda tanks extra range, they were fitted with a Rotatrailer; an unarmoured trailer which carried extra supplies. The content was 10 gallons of water and 12 man/days of rations, 100 rounds of 2-pounder ammunition and 12 gallons of lubricating oil, with 120 gallons of fuel carried in the wheels.[35] In terms of the quality of his tanks, General Wavell expressed significant doubts:
Axis forces The 5th Light Division was in reserve with 57 Panzer III and Panzer IV tanks plus 39 Panzer I and Pz II and the initial defence of the frontier would fall to the 15th Panzer Division. The panzer regiment of the 15th Panzer Division was the 8th Panzer Regiment, which numbered 36 Panzer II and approximately 62 Panzer III and IV.[37] Most of the remaining units of the division[nb 14] were dispersed to various strong points along Rommel′s defensive line.[nb 15]Also under operational control of the 15th Panzer Division was the Italian Trento Division; while most of the Trento Division was stationed at Bardia, three infantry battalions and an artillery regiment were placed in the Sollum-Musaid-Capuzzo area.[17] One Italian anti-tank company under Major Leopoldo Pardi was at Halfaya Pass, equipped with German 88mm and Italian 100/17mm guns and anti-tank gunners of the Trento, equipped with 47mm guns and a truck mounted 105/28mm naval gun were also present.[39] The 5th Light Division′s primary unit was the 5th Panzer Regiment, which had 96 tanks of which 57 were medium tanks. Total Axis strength for the operation was 13,200 men (5,700 Germans, 7,500 Italians), ~194 tanks (75 Panzer II, 119 Panzer III and Panzer IV),[37] 130 fighters (60 German and 70 Italian) and 84 bombers (59 German, 25 Italian).[2] | ||||
Battle
Day 1: 15 June
Allies establish air superiority
For the RAF, everything went according to plan on the first day. Axis supply columns and airfields had been hit repeatedly up to the start of the attack and once the operation began, British columns were able to move unmolested from their starting points at Sofafi and Buq-Buq, to their destinations covered by RAF fighters. Axis aircraft managed only six attacks that day.[40]
Failed attack on Halfaya Pass
On the eastern side, at 05:15, Coast Force—commanded by Brigadier Reginald Savory and charged with capturing Halfaya Pass—started to move on to their objective.[41]
On the top of the escarpment was the Halfaya Group, composed of the 2nd battalion Queen's Own Cameron Highlanders, the 13 tanks (twelve Matildas and one light tank)[42] of the 4th Royal Tank Regiment′s C Squadron (which had previously captured Halfaya Pass during Operation Brevity[43]), and an artillery battery from the 31st Field Regiment. To their east and below the lip of the escarpment were the 1st Battalion 6th Rajputana Rifles and 2nd Battalion 5th Mahratta Light Infantry, two troops of the 4th Royal Tank Regiment′s A Squadron,[33] and a few 25-pounder guns.
At 05:40, British artillery for the Halfaya Group was scheduled to open fire on the German and Italian forces stationed in Halfaya to provide cover for the tanks and infantry, but the battery had become bogged down by soft sand.[44] After waiting until 06:00, 15 minutes after the fighting began to the west below the escarpment, the commander of C Squadron—Major C.G. Miles—ordered his tanks to attack at the top of the pass; soon after, though, the anti-tank guns of the German and Italian defenders opened fire and within a few hours all but one light tank and one of the Matildas had been destroyed, including Miles' own.[42] The Cameron Highlanders initially continued their advance but were soon driven back by a detachment of German armoured cars and motorised infantry.[45]
The British forces below the escarpment did not fare much better, as four of the Matildas were disabled by anti-tank mines which were supposed to have been cleared;[33] this blocked the path of the remaining two and reduced the small tank force to acting in a pillbox capacity.[33] The Rajputana Rifles and Mahrattas made several attempts to reach the pass, but were repelled each time; the former lost their commanding officer—Colonel P.R.H. Skrine—in the final attack.[46]
Fort Capuzzo captured
At the central thrust, the 7th Royal Tank Regiment had reached Fort Capuzzo by noon and scattered the defenders who retreated north to join the 15th Panzer Division which lay between them and Bardia.[47] Soon after, however, they faced several counterattacks by a battalion from the 8th Panzer Regiment of the 15th Panzer Division. After being joined by the 22nd Guards Brigade, they faced the final and largest counterattack at 18:30, but managed to repulse it.[48] These were, in actuality, not serious assaults, as Rommel would not commit the 15th Panzer Division to battle without having additional information on the situation. Instead, the 8th Panzer Regiment′s primary tactic was to skirmish briefly and then feign a disordered rout in order to lure Matilda tanks into a chase which led them directly into concealed anti-tank guns. Neither side took much damage from these actions.[49] In response to the British capture of Capuzzo, and concerned with a possible attack on Sollum and Bardia, Rommel ordered the 5th Light Division to Sidi Azeiz in preparation for a possible counter-attack.[50]
With the exception of the units which had been detached to support the attack on Halfaya, the 4th Royal Tank Regiment had been used as a flank guard for the 7th Royal Tank Regiment. While Squadron B was kept in reserve, the three remaining troops of Squadron A (12 tanks) had initial success against Battle Position (B.P.) 38, capturing 200 Axis prisoners and eight field guns with virtually no loss. These gains were lost when Squadron A were repelled at Point 206 and German forces counter-attacked at B.P. 38. In the evening, after Squadron A had been whittled down to only one remaining tank, the sixteen tanks of Squadron B were brought into action and Point 206 was captured.[44]
In capturing these objectives, the British also took over 500 German and Italian prisoners.[51] That night, the 2nd Scots Guards—a battalion of the 22nd Guards Brigade—were able to advance further eastward and additionally capture an outpost at Musaid.[52]
Assault on Hafid Ridge repulsed
On the western side, the 7th Armoured Brigade had placed the 2nd Royal Tank Regiment, equipped with older cruiser tanks, in front of the 6th Royal Tank Regiment so that the new Crusader tanks of the latter could be used as a surprise weapon.
The force reached Hafid Ridge (which actually consisted of three separate ridges) by about 09:00. After 2nd Royal Tank Regiment had crossed over the first ridge, they were attacked at near point-blank range by dug in anti-tank guns, destroying two A9 cruiser tanks before the rest could retreat.[48] This development posed a serious problem for the brigade, as the cruiser tanks were armed with 2-pounder anti-tank guns which lacked the High Explosive (HE) rounds needed to effectively engage infantry and artillery. Supporting artillery was not immediately accessible either, as it was attached to the Support Group in the south-west which was covering the 7th Armoured Brigade′s flank.
Since a frontal attack was infeasible, it was decided to attempt a flanking attack while waiting for the artillery to arrive. A small force of tanks[nb 16] from the 2nd Royal Tank Regiment was sent to the western part of the Hafid Ridge with orders to turn into the first valley. The attack went well at first, as the tanks caught the Axis forces unaware and were able to strafe along their trenches with their machine guns, losing only one tank in the process.[48] As they approached point 208 on their way eastward though, the commander became aware of its fortifications and ordered his units to disengage; due to an equipment shortage, only one tank per troop was equipped with a radio and five of his tanks, not receiving the order, continued towards Point 208 and were destroyed by its emplaced 88 mm guns.
Soon, reports came in from Allied aircraft that German tanks were approaching and the order was given to clear the ridges in order to utilize its advantageous terrain for the upcoming tank battle.[49] At 17:30 reports came in from the forward observers that the defences were withdrawing from Hafid Ridge.[51] This seemed like the ideal time to strike, so the order was given for Squadron B of the 6th Royal Tank Regiment to attack.[53][nb 17] After clearing the first ridge, it looked as though the reports were accurate, as German trucks and towed guns were seen moving away over the second crest. Pursuit was given, but upon the British forces clearing the second ridge, the Axis forces sprung their trap and fired on the Crusader tanks at near point-blank range with waiting guns; within minutes, 11 of the Crusaders were destroyed and six more heavily damaged.[54] The Axis infantry and anti-tank guns, bereft of entrenchments, also took significant casualties.[49]
It was at this time that over 30 German tanks from a battalion of the 5th Panzer Regiment, part of the 5th Light Division which had earlier been stationed north at Sidi Azeiz, were seen arriving from the west.[54] As it was starting to grow dark, neither side closed with the other and the 7th Armoured Brigade slowly withdrew during long range fighting.
Outcome of day 1 and plans for day 2
By the end of the first day, Fort Capuzzo had been captured and Halfaya Pass and Hafid Ridge remained in Axis possession. During the attacks, the British had lost a significant number of tanks. In the 7th Armoured Brigade, the 2nd Royal Tank Regiment was down to 28 cruiser tanks and the 6th Royal Tank Regiment to only 20 of their 50 Crusaders; many of the tanks which had been disabled but were repairable, were abandoned in the field as the 7th Armoured Brigade withdrew from Hafid Ridge, leaving them for seizure by German tank recovery teams. The 4th Armoured Brigade, from its original strength of roughly 100 Matildas, was down to 37 (though 11 more were repaired by the following morning).[55] German panzer losses were mostly insignificant, though there had been many casualties among the garrisons at Hafid Ridge, Point 206 and Fort Capuzzo. Beresford-Peirse planned to have the 11th Infantry Brigade continue its attack next day on Halfaya Pass, the 22nd Guards Brigade to hold their position and for the 4th Armoured Brigade to reinforce the 7th Armoured Brigade for a combined attack on the outnumbered 5th Light Division.[56]
Through the intelligence interception service, Rommel had a fairly clear picture of the British situation, including their losses, problems and the new orders issued by Beresford-Peirse.[57] Rommel was concerned was for the forces at Halfaya Pass, which were trapped by the 22nd Guards Brigade on one side and the 11th Infantry Brigade on the other and running low on supplies. His plan was to have the 5th Light Division, which by midnight had almost fully reached Sidi Azeiz, drive south towards Sidi Omar and then east towards Sidi Suleiman and then north-east to Halfaya Pass, approaching the 11th Infantry Brigade from the rear. To prevent the re-deployment of Matildas, either to reinforce the 7th Armoured Brigade as Beresford-Peirse planned or to assist the British forces at Halfaya, Neumann-Silkow was ordered to attack Capuzzo.[58] He ordered the attacks to begin while still dark, as the British intended to start their operations shortly after dawn.[59]
Day 2: 16 June
No progress made at Halfaya Pass
The 11th Infantry Brigade renewed their attack on Halfaya Pass, but met with same failure as the day prior. Bach′s forces—though outnumbered and running low on supplies—were now totally surrounded, and thus could not retreat even if they were inclined to do so. Masservy—seeing this lack of progress—disregarded Beresford-Peirse′s orders to release his tanks and decided to retain the few remaining Matildas he had until some breach of the Axis defences could be made.[60]
German counter-attack repelled at Capuzzo
Neumann-Silkow began his attack on British held Fort Capuzzo at 06:00. He organized the 80 tanks under his command into two columns and attacked Capuzzo from either side.[59] The attack went poorly from the onset, as the 15th Panzer Division ran directly into heavy artillery from 25-pounders which had been brought up during the night and Matlida tanks in entrenched positions. By 10:00, the 15th Panzer Division had lost fifty of its tanks, and by 12:00, they were forced to withdraw.[59] Soon after the German forces withdrew the Scots Guards advanced further west, capturing the Sollum barracks to prevent Axis forces from either flanking on the east or linking up with the Halfaya garrison.[60]
Running battle on the western flank
Starting at dawn, the 5th Light Division began to advance southwards past the western edge of Hafid Ridge. The 7th Armoured Brigade kept pace with them to the east, joined by the 7th Support Group as the two forces approached Sidi Omar.
During the running skirmish, the British tanks had a few successful attacks against unarmoured German transport vehicles, but they found themselves at a significant disadvantage anytime they engaged the panzers, who utilized an extremely effective tactic against them. The Panzer IVs, armed with high-explosive 75 mm (2.95 in) guns with an effective range of ~2750 m,[61] would open fire while still well out of the roughly 460 m (500 yd) range of the 2-pounder guns found on British tanks.[61] While this would do minimal damage to the British tanks, it decimated their towed 25-pounder artillery, which would be forced to withdraw. Without British artillery to concern them, the Panzer IV and 50 mm (1.97 in) gun armed Panzer III's could then safely close range with their British counterparts and pick off the thinly armed cruiser tanks while still remaining beyond the range of the British tank guns.[61] If the British tanks attempted to move forward to engage the panzers, the latter would quickly retreat behind a pre-established screen of anti-tank guns while lighter armoured elements would begin to move around the British flanks.[60] To make matters worse for the 7th Armoured Brigade, they had problems with the reliability of their tanks and suffered numerous breakdowns.[60]
By evening, both regiments of the 7th Armoured Brigade had retreated east of the Frontier Wire and the 7th Support Group and withdrawn even further. At 19:00, just as dusk fell, the 5th Light Division further weakened the 7th Armoured Brigade with a strong attack which only ended due to the onset of complete darkness.[62]
Outcome of day 2 and plans for day 3
Rommel—who had seen several of the engagements between the 7th Armoured Brigade and 5th Light Division—decided to attempt a full thrust against the 7th Armoured Brigade. At 16:00, he ordered the 15th Panzer Division to leave only minimal elements at its position north of Fort Capuzzo and make all haste to the northern flank of the 5th Light Division, which was pressing eastward to Sidi Suleiman.[63] He hoped to cut off the majority of the British forces, encircling and then eliminating them.
During the afternoon, Wavell had flown to Beresford-Peirse, to simplify the making of decisions. When he arrived, Beresford-Peirse was away, meeting with Messervy and Creagh, where he reconfirmed his orders for the infantry to maintain its attack on Halfaya and hold Capuzzo, while the 4th Armoured Brigade was to join the 7th Armoured Brigade, to confront the 5th Light Division to the west.[62] That night, on learning of the 5th Light Division advance, Messervy took the initiative and ordered his forces to withdraw and ordered the remaining Matildas of the 4th Armoured Brigade to form a screen, to protect the retreating infantry from the advance of the panzers to the west.[63]
The 7th Armoured Brigade had lost more than half of the cruiser tanks operational in the morning and was down to 21 runners.[64] The 4th Armoured Brigade had been reduced to 17 Matildas.[65]
Day 3: 17 June – The British narrowly escape encirclement
At 04:30, Rommel′s panzers began their advance.[66] The 5th Light Division encountered the 7th Armoured Brigade at 06:00 and began pushing them back. By 08:00 that morning, they had reached Sidi Suleiman.[67] At Capuzzo, the early morning movements of the 15th Panzer Division led Messervy to believe another attack was imminent, and he thus cancelled Beresford-Peirse′s orders for the 4th Armoured Brigade to reinforce the 7th so that they could be retained.[68] The combination of the two events caused serious alarm to Creagh, who then sent a message to Beresford-Peirse, requesting his presence for instruction;[68] Wavell, who was with Beresford-Peirse, took command of the operation and boarded a plane to Creagh′s command post at Halfway House.[66] This message was also intercepted by the Germans, as Rommel later wrote:
| “ | It sounded suspiciously as though the British commander no longer felt himself capable of handling the situation. It being now obvious that in their present bewildered state the British would not start anything for the time being, I decided to pull the net tight by going on to Halfaya.[66] | ” |
By this time, both the 5th Light Division and the 15th Panzer Division—striking from the south-west and north-west respectively—were only 9 mi (14 km) away from Halfaya.[69]
At 10:00, as the Panzer divisions pushed eastward, they ran into the remaining Matildas of the 4th Armoured Brigade, joined on the flank by the remaining cruisers and artillery of the 7th Armoured Brigade and 7th Support Group. The armour had now formed a screen to protect the 22nd Guards Brigade and 11th Indian Infantry Brigade as they retreated toward Halfway House.[70]
At 10:45, Messervy contacted Creagh over the radio and, speaking Hindustani for security, informed him that he had ordered a retreat of his infantry from Capuzzo and Halfaya, to begin at 11:00.[69] At noon, an hour later, Wavell and Beresford-Peirse arrived at Halfway House and learned of the retreat Messervy ordered, to which Wavell then gave his approval.[69]
The armoured clash raged throughout the afternoon as the British armour stalled the panzer advance to Halfaya until 16:00, by which time the 22nd Guards had safely escaped.[70]
Aftermath
With the British forces defeated and with no available reserves, Egypt lay wide open to Rommel. However, his critical supply position and the continuing threat in his rear from the Tobruk garrison, prevented him from attempting to exploit his success.
Casualties
Human casualties for both forces were both relatively light and fairly even. The Allies had 969 casualties, with 122 killed, 588 wounded, and 259 missing. The Germans had 678 casualties, with 93 killed, 350 wounded and 235 missing,[2] while their Italian allies suffered 592 casualties in total.[71] Sergeant Michele Perriello of the 62nd Trento Infantry Regiment would win a posthumous Medaglia d'Oro, Italy's highest award for bravery. His medal citation says that he launched a counterattack with the men of his patrol, forcing attacking infantrymen to retreat, and was later killed manning an anti-tank gun.[72] Major Pardi, who commanded a battery of Italian anti-tank gunners that knocked out several British tanks,[39] was awarded the German Iron Cross 1st Class.[nb 18]
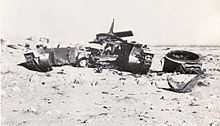
During the course of the battle, tank losses were considerably skewed against the British, who lost 98 tanks (3 Light, 30 cruisers and 65 Matildas) either through enemy actions or by mechanical breakdown while the Axis had roughly 50 disabled, not including tanks which had been knocked out and repaired during the battle itself. This was not reflective of the final outcome, however, since the Axis controlled the battlefield and they were able to recover all disabled vehicles, Allied and Axis alike, for salvage and repair; in the end, they only lost 12 tanks.[2]
In terms of aircraft, the British suffered considerably higher losses than the German and Italian forces. They lost 33 fighters and three bombers in comparison to the destruction of 10 German aircraft.[2] The primary reasons for such a high loss of RAF fighters—as stated by Air Marshal Tedder—was lack of sufficient pilot training and the need for continuous air cover; in order to keep fighters up at all times, it meant that each individual patrol had to be relatively weak.[2]
Political consequences
Winston Churchill was displeased with the results of Operation Battleaxe. He had been expecting nothing less than complete success in the operation, and had instead received news that, not only had the operation failed, but that a great deal of the tanks that he had specially sent for it had been lost.
Churchill thus wanted Wavell out of the picture, but he could not have it look as though Wavell were being punished; far too many would defend the Commander-in-Chief and the blame could come back to London;[74] he also could not have Wavell return to England, as embarrassing questions could be raised. Churchill instead seemed to have found an elegant solution by simply having Wavell exchange duties with the man he wanted to take charge in the Western Desert, General Claude Auchinleck, Commander-in-Chief, India.[74] Along with Wavell went Michael O'Moore Creagh, who was replaced by William Gott.[75]
Beresford-Peirse was criticized for both his plan and control of the operation[76] and on 4 October was sent to Sudan with the position of General Officer Commanding, Sudan;[77] he took the place of William Platt, who had been promoted to Commander-in-Chief of the newly created East Africa Command.[78] Beresford-Peirse was in turn replaced as commander of XIII Corps by Lieutenant-General Reade Godwin-Austen, who had been promoted from commanding the 12th (African) Division in the East African Campaign.
See also
- List of World War II Battles
- North African Campaign timeline
Footnotes
- ↑ "The whole force, comprising about twenty-five thousand men, was under General Beresford-Peirse".[1]
- ↑ The operation began with "90 cruisers and roughly 100 'I' tanks"[2] and R
98 fighters[3]
105 bombers[3] 13,200 soldiers
196 tanks[nb 3] - ↑ "The 8th Panzer Regiment began the battle with about 100 tanks, of which probably 50 were gun tanks; the 5th Panzer Regiment had 96 tanks, of which 57 were gun tanks".[2]e Brit
130 fighters[nb 4]
36 aircraft]], [[Egypt]]. T33 fighters and 3 bomberss of World War II|Allied]Playfair, p. 171 - ↑ 60 serviceable German single and twin-engine fighters, and 70 serviceable Italian fighters.[3]day, b
84 bombers[nb 5]-98 tanks of German forceLosses, in tanks, left behind on the battlefield: 4th RTR: 30 MK II Infantry tanks, 1 MK VIC Light tank; 7th RTR: 35 MK II Infantry tanks, 1 MK I Cruisertank, 2 MK VIC light tanks; 2nd RTR: 12 cruisers; 6th RTR: 16 MK VI Cruisers; 7th Armoured Brigade HQ: 1 MK II Cruiser.[4] - ↑ 59 serviceable German bombers and dive bombers, and 25 serviceable Italian bombers.[3]rowly Casualties and losses
969 casualties[nb 6]
91iddle East Comma27 Cruiser and 64 infantry tanks were lost due to breakdown or enemy action and were unrecoverable following the operation.[2] - ↑ 122 killed, 588 wounded and 259 missing[2]
- ↑ 93 Germans killed, 350 wounded and 235 missing. Italian casualties are unknown; the British claimed to have captured 350 Italian prisoners during the battle but had to release them during their withdrawal.[2]upply
12 tanks[nb 8] 5th Panzer Regiment lost 4 tanks destroyed (2 Panzer II and 2 Panzer III) and 8th Panzer Regiment lost 8 tanks destroyed (3 PanzerII, 4 Panzer III, and 1 Panzer IV).[2][4] - ↑ The 7th Armoured Division claimed to have destroyed 90 enemy tanks. Wellingtons and [[BrJentz, p. 186
- ↑ An earlier name for this operation was Operation Bruiser [5] and it was still referred to as such in telegrams to and from London.[6] Both Churchill and Rommel also called this action "The Battle of Sollum".[7][8]
- ↑ On a nightly basis RAF Vickers Wellington medium bombers would bomb the harbour of Benghazi,the most forward supply port for the Axis forces, while during the day supply convoys and airfields were attacked by both Wellingtons and Blenheim light bombers.[10]
- ↑ The convoy comprised five 15-knot merchant ships: Clan Chattan, Clan Lamont, Clan Campbell, Empire Song and New Zealand Star. On board these five ships were 295 tanks and 53 Hurricane fighters.[11]
- ↑ The tank reinforcements consisted of 21 Mark VI light tanks, 82 Cruiser tanks (including 50 of the new Crusader tanks) and 135 Infantry tanks.[14]
- ↑ Two earlier plans were rejected. In the first, infantry and heavy infantry tanks were to clear the frontier while the fast cruiser tanks were to make straight for enemy forces besieging Tobruk; this was rejected due to lack of sufficient forces. The second was for the 7th Armoured Division to position itself west of Fort Capuzzo in order to draw out and eliminate the enemy's armoured forces; this plan was rejected since it did not utilize all available Allied forces.[17]
- ↑ Other units include: the 1st Battalion of the 104th Schützen (mechanized infantry) Regiment, 33rd Panzerjäger (tank-hunter) Battalion (armed with 12 5 cm PaK 38 and 21 3.7 cm PaK 36), 15th Kradschützen (motorcycle) Battalion, 33rd Reconnaissance Battalion, 1st Battery of the 33rd Artillery Regiment and an anti-aircraft battery with 13 88 mm guns
- ↑ The most potent of these strong points was likely that at Halfaya Pass, which consisted of 500 Germans from the 104th Schützen Regiment and 400 Italians. They were armed with five 88 mm guns, four Italian 100/17 mountain howitzers, a battery of 155 mm French guns taken from the Mareth Line in Tunisia and numerous other smaller guns. This force was led by Hauptmann Wilhelm Bach, who had previously commanded the recapture of Halfaya Pass in May[38]
- ↑ John Delany in Fighting the Desert Fox claims one squadron while The Crucible of War states it was two.
- ↑ It should be noted that Moorehead's The North African Campaign 1940–43 states that two squadrons of Crusaders were sent in.
- ↑ "Rommel commenta: Za truppa italiana, rende molto quando guidata da capi valenti. Verità ben conosciuta da noi, che è bene però anche sentire da uno straniero. Il maggiore Pardi venne insignito della Croce di Ferro tedesca di 1* classe." (Rommel commented : Italian troops, achieve much when driven by talented leaders. A truth well known to us, which is good also to hear from a stranger. Major Pardi was awarded the German Iron Cross class 1)[73]
Citations
- ↑ 1.0 1.1 Churchill (1986), p. 305
- ↑ 2.0 2.1 2.2 2.3 2.4 2.5 2.6 2.7 2.8 2.9 2.10 2.11 2.12 Playfair, p. 171
- ↑ 3.0 3.1 3.2 3.3 3.4 Playfair, p. 166
- ↑ 4.0 4.1
- ↑ Churchill (2001), p. 1097
- ↑ Connell, p. 483
- ↑ Churchill (2001), p. 872
- ↑ Rommel, p. 146
- ↑ Maule, p. 115
- ↑ 10.0 10.1 10.2 10.3 10.4 10.5 10.6 Bradley, p. 166
- ↑ 11.0 11.1 Playfair, p. 116
- ↑ Playfair, p. 114
- ↑ Playfair, p. 118
- ↑ Pitt, p. 294
- ↑ Playfair, p. 119
- ↑ Playfair, pp. 116, 119
- ↑ 17.0 17.1 17.2 17.3 Playfair, p. 164.
- ↑ Playfair, pp. 1–2, 32, 163–164
- ↑ 19.0 19.1 19.2 Playfair, p. 163
- ↑ Playfair, p. 162
- ↑ Rommel, p. 137
- ↑ Hall, p. 189
- ↑ Maule (1961), p. 119
- ↑ 24.0 24.1 Pitt, p. 296
- ↑ Delany, p. 37
- ↑ Pitt, p. 295
- ↑ Moorehead, p. 121
- ↑ Intelligence and Strategy: Selected Essays, pg. 222
- ↑ Afrikakorps (Third Reich), pg. 52
- ↑ Rommel, p. 141
- ↑ Latimer (2001), p.26
- ↑ 33.0 33.1 33.2 33.3 Liddell Hart, p. 83
- ↑ Liddell Hart, p. 86
- ↑ "Collections – Rototrailer". Tank Museum. Retrieved 1 June 2009.
- ↑ Churchill (1986), p. 304
- ↑ 37.0 37.1 Jentz, p. 157
- ↑ Maul (1961), p. 119
- ↑ 39.0 39.1 Greene, Massignan, p. 72
- ↑ Playfair, 1960, p. 167
- ↑ Valour Enshrined: A History of the Maratha Light Infantry, pg. 284
- ↑ 42.0 42.1 Liddell Hart, p. 84
- ↑ Liddell Hart, p. 78
- ↑ 44.0 44.1 Liddell Hart, p. 85
- ↑ Maule (1961), p. 120
- ↑ Maule, p. 121
- ↑ Delany, p. 39
- ↑ 48.0 48.1 48.2 Pitt, p. 299
- ↑ 49.0 49.1 49.2 Delany, p. 41
- ↑ Afrikakorps (Third Reich), pg. 56
- ↑ 51.0 51.1 Moorehead, p. 127
- ↑ Pitt, p. 302
- ↑ Patterson, Ian. "The History of the British 7th Armoured Division, "The Desert Rats"". Archived from the original on 2012-06-30. Retrieved 2007-06-29.
- ↑ 54.0 54.1 Pitt, p. 300
- ↑ Pitt, p. 300–301
- ↑ Delany, pp. 41–42
- ↑ Pitt, pp. 301–302
- ↑ Delany, p. 42
- ↑ 59.0 59.1 59.2 Pitt, p. 303
- ↑ 60.0 60.1 60.2 60.3 Delany, p. 43
- ↑ 61.0 61.1 61.2 Pitt, p. 304
- ↑ 62.0 62.1 Pitt, p. 306
- ↑ 63.0 63.1 Delany, p. 44
- ↑ Moorehead, p. 129
- ↑ Afrikakorps (Third Reich), pg. 60
- ↑ 66.0 66.1 66.2 Pitt, p. 307
- ↑ Ravenstein, Portrait of a German General, pg. 60
- ↑ 68.0 68.1 Liddell Hart, p. 89
- ↑ 69.0 69.1 69.2 Liddell Hart, p. 90
- ↑ 70.0 70.1 Pitt, p. 308
- ↑ Greene, p. 73
- ↑ PERRIELLO Michele
- ↑ Rivista aeronautica (in Italian) (Association Culturale Aeronautica) 28: 902. 1952. Missing or empty
|title=(help) - ↑ 74.0 74.1 Pitt, p. 309
- ↑ Harding of Petherton: Field Marshal, pg. 73
- ↑ Montgomery's Desert Army, pg. 7
- ↑ Churchill, Winston. The Churchill War Papers, pg.731
- ↑ The London Gazette: (Supplement) no. 37695. p. 4220. 30 August 1946.
References
- Bradley, John H.; Dice, Jack W. (November 2002). The Second World War: Europe and the Mediterranean. West Point Military History Series. Square One Publishers. ISBN 978-0-7570-0160-4.
- Brown, David (editor) (November 2001). The Royal Navy and the Mediterranean: November 1940 – December 1941: Vol 2. Whitehall Histories. Frank Cass Publishers. ISBN 978-0-7146-5205-4.
- Churchill, Winston S. (2001). Gilbert, Martin, ed. The Ever Widening War: Volume 3 1941. The Churchill War Papers. London: W. W. Norton & Company. ISBN 0-393-01959-4.
- Churchill, Winston S. (1986) [1953]. Second World War, Volume 3: The Grand Alliance. Mariner Books. ISBN 978-039541-057-8.
- Connell, John (1964). Wavell, Scholar and Soldier. Methuen Australia.
- Delany, John (September 1998). Fighting the Desert Fox: Rommel's Campaigns in North Africa April 1941 to August 1942. Arms & Armour. ISBN 978-1-85409-407-0.
- Editors (July 1990). Afrikakorps (Third Reich). Time-Life Education. ISBN 978-0-8094-6983-3.
- Gilbert, Martin (1989). The Second World War: A Complete History. H. Holt. ISBN 978-0-8050-0534-9.
- Greene, Alessandro; Massignani (July 1999). Rommel's North Africa Campaign: September 1940 – November 1942. Great Campaigns. Da Capo Press. ISBN 978-158097-018-1.
- Hall, Timothy. Tobruk 1941, the desert siege. Methuen Australia. ISBN 0-454-00667-5.
- Jentz, Thomas L. (1998). Tank Combat in North Africa: The Opening Rounds, Operations Sonnenblume, Brevity, Skorpion and Battleaxe, February 1941 – June 1941. Schiffer Publishing Ltd. ISBN 0-7643-0226-4.
- Latimer, Jon (2004). Tobruk 1941: Rommel's Opening Move. Greenwood Press. ISBN 0-275-98287-4.
- Liddell Hart, Basil H. (1959). The Tanks: The History of the Royal Tank Regiment and its Predecessors, Heavy Branch, Machine-Gun Corps, Tank Corps, and Royal Tank Corps, 1914–1945. London: Cassell. ISBN 978-0-89201-079-0.
- Maule, Henry (1961). Spearhead general: The epic story of General Sir Frank Messervy and his men in Eritrea, North Africa and Burma. London: Odhams. OCLC 2127215.
- Moorehead, Alan (April 2001). Desert War: The North African Campaign 1940–1943. London: Penguin. ISBN 978-0-14-027514-8.
- Pitt, Barrie (December 1989). Crucible of War: Western Desert 1941 (New Ed edition ed.). Paragon House. ISBN 978-1-55778-232-8.
- Playfair, Major-General I.S.O.; with Flynn R.N., Captain F.C.; Molony, Brigadier C.J.C. & Toomer, Air Vice-Marshal S.E. (2004) [1st. pub. HMSO 1956]. Butler, J.R.M, ed. The Mediterranean and Middle East, Volume II The Germans come to the help of their Ally (1941). History of the Second World War, United Kingdom Military Series. Naval & Military Press. ISBN 1-84574-066-1.
- Rommel, Erwin; Findlay, Paul (translator); Liddell Hart, Basil (editor) (March 1982) [1953]. The Rommel Papers (New edition ed.). Da Capo Press. ISBN 978-0-306-80157-0.
Further reading
- Dando, N. (2014). The Impact of Terrain on British Operations and Doctrine in North Africa 1940–1943 (PDF) (PhD). Plymouth University. OCLC 885436735. Retrieved 25 March 2015.
- Maughan, Barton (1966). Tobruk and El Alamein. Australia in the war of 1939–45 (Series 1 Army) III. Canberra: Australian War Memorial. OCLC 464063856.
External links
| Wikimedia Commons has media related to Operation Battleaxe. |
- Achtung Panzer! – Johannes Kümmel – Der Löwe von Capuzzo / The Lion of Capuzzo
- AFV News – OPERATION "BATTLEAXE" The Second British Repost
- AFV News – THE DEADLY "88" Rommel's Answer to the "Matilda II"
- Italian Tanks at War – North Africa (12 February 1941 – 13 May 1943)
- The Relief of Tobruk, Chapter 2: Lull in the Desert (Part of The Official History of New Zealand in the Second World War 1939–1945)
- Lone Sentry – The Development of German Defensive Tactics in Cyrenaica—1941 (Military Intelligence Service, Special Series No. 5, 16 October 1942)
- 6th Royal Tank Regiment war diaries
- BBC – WW2 People's War – Fact File: Operation Battleaxe
- Animated Map of Operation Battleaxe