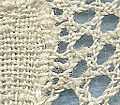
Mesh grounded bobbin lace
Mesh grounded lace is a continuous bobbin lace also known as straight lace. Continuous bobbin lace is made in one piece on a lace pillow. The threads of the ground enter motifs, then leave to join the ground again further down the process, all made in one go. This is different to part lace, where the motifs are created separately, then joined together afterwards.
Mesh grounded lace is a group of lace types that may look very different but share several common properties.
Classification: Context and sub types of mesh laces
In the middle of the eighteenth century, many laces could be definitely named by their grounds. In 1820-30 lace making was so widespread that names refer to a kind of lace and no longer to the place were it was made.[1]:30 The inherently complex study of lace is further complicated by the use of foreign terms, of alternative terms, and by contradictory usage.[2]:26–27 Moreover lace makers have other viewpoints than collectors and curators, so classification is not a black-and-white discussion. The following overview follows a construction point of view that is recognizable when looking into the minute details, but even with this approach the exception proves the rule.
- Continuous bobbin lace also known as: straight lace or fil continu.
Worker pair versus two pair per pin
Dense areas of lace have the worker pair acting like wefts weaving to and fro, and passive threads hanging downwards, like warps. In point ground, the workers stay in the dense area, and the passives join or leave, one pair per pin (the pins define the pattern).[5] The worker properties also apply to Torchon and Freehand lace.
The images below compare fragments of lace with a similar ground. Flanders uses a single pin in the centre of the rectangles, the Torchon Rose ground uses a pin at each edge of the rectangle. The Torchon motif has a weaver in the dense motive, the Flanders motive has no pair making U-turns around pins.
-

Flanders lace: a single pin (red dot) connects two pairs of the ground with the motif
-

Color coded diagram of the Flanders sample
-

Torchon lace: two pins (red dots) connect two pairs of the ground with the motif
Ring pair
The Flanders sample illustrating the two pair per pin principle also shows a ring pair: a pair following the shape of the motive, but unlike the gimp it has some distance.
-

Another example of a ring pair
Belgian color code
Many pattern books and directions for making lace were printed in the first half of the sixteenth century; but very few were printed after about 1565.[1]:11 Originally skilled lacemakers made samples of new designs that were passed around to less skilled lace makers. At the time this was the only way of learning new designs.[4]:17 To date we have instruction and pattern books with diagrams. As bobbin lace is worked by plaiting or weaving pairs of threads, lines in many diagrams represent pairs, less elaborate to draw and easier to read large sections. Basic lessons or special tricks are explained with thread diagrams. Black and white pair diagrams do not contain enough information to reproduce the intricate mesh laces. The Kantnormaalschool (School of Lace Teaching) founded in Brugge in 1911 developed a color code.[4]:18 Simply put: were lines cross, a color indicates what to do at that point. The method is commonly accepted and applied in modern pattern books. Especially for mesh laces though other types of lace types may also benefit from the drawing technique.
Corners and joining
Before the mid-nineteenth century, not many corners were designed. For commercial use straight length were cut and rejoined or gathered to fit around a corner. After the First World War lace-making became a craft and manufacturing was no longer and issue.[4]:36 To close a square for a handkerchief, still two parts need to be joined. After overlapping and exactly matching the pattern, stitches are oversewn with a thinner thread that exactly matches the color of the lace.[4]:24–26 Wherever possible avoid sewing in cloth stitch, in corners and in open ground,[6]:18–22 in other words: don't sew along a straight line but carefully choose the path for the sewings to make it as little visible as possible. Other methods are needle weaving, and the detour technique with knots or overlapping threads.[6]:7
-

A Flanders edge reaching an overlapped section for sewing
-

Overlapped Flanders lace, repinned to stay in shape and be sewn over (much) later
-

Cutting off excess material of another Flanders exercise
-

Mixed Torchon exercise of detour knots and overlapped sewing
-

Front of the mixed exercise
References
- ↑ 1.0 1.1 Reigate, Emily (1986). An Illustrated Guide to Lace (1988 ed.). Antique Collers' Club Ltd. p. 44. ISBN 1-85149-003-5.
- ↑ 2.0 2.1 Earnshaw, Pat (1985). The Identification of Lace. De Bilt: Cantecleer. ISBN 9021302179.
- ↑ Nottingham, Pamela (1995). The technique of Bobbn Lace. London: Batsford. ISBN 0 486 29205 3.
- ↑ 4.0 4.1 4.2 4.3 4.4 Niven, Mary (1998). Flanders Lace, a step by step guide (paperback 2003 ed.). London: Batsford. ISBN 0713488158.
- ↑ Pam Robinson. Point Ground Lace.
- ↑ 6.0 6.1 Löhr, Ulrike (2000). The beginning of the end. Stuttgart: frech. ISBN 3772426956.
| |||||||||||||||||||||||||||||||||||||||||||||||||||||
