Battle of Bardia
| ||||||||||||||||||||||||||||||
| ||||||||||||||||||||||||||||||
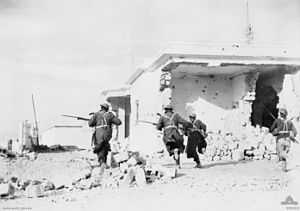
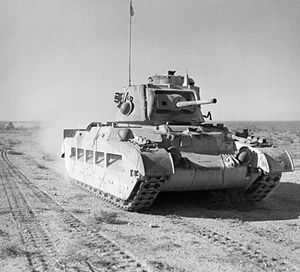
The Battle of Bardia was fought over three days between 3 and 5 January 1941, as part of Operation Compass, the first military operation of the Western Desert Campaign of the Second World War. It was the first battle of the war in which an Australian Army formation took part, the first to be commanded by an Australian general and the first to be planned by an Australian staff. Major General Iven Mackay's 6th Division assaulted the strongly held Italian fortress of Bardia, Libya, assisted by air support and naval gunfire, and under the cover of an artillery barrage. The 16th Infantry Brigade attacked at dawn from the west, where the defences were known to be weak. Sappers blew gaps in the barbed wire with Bangalore torpedoes and filled in and broke down the sides of the anti-tank ditch with picks and shovels. This allowed the infantry and 23 Matilda II tanks of the 7th Royal Tank Regiment to enter the fortress and capture all their objectives, along with 8,000 prisoners.
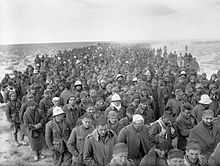
In the second phase of the operation, the 17th Infantry Brigade exploited the breach made in the perimeter, and pressed south as far as a secondary line of defences known as the Switch Line. On the second day, the 16th Infantry Brigade captured the township of Bardia, cutting the fortress in two. Thousands of prisoners were taken, and the Italian garrison now held out only in the northern and southernmost parts of the fortress. On the third day, the 19th Infantry Brigade advanced south from Bardia, supported by artillery and the Matilda tanks, now reduced in number to just six. Its advance allowed the 17th Infantry Brigade to make progress as well, and the two brigades reduced the southern sector of the fortress. Meanwhile, the Italian garrisons in the north surrendered to the 16th Infantry Brigade and the Support Group of the British 7th Armoured Division outside the fortress. In all, some 36,000 Italian prisoners were taken.
The victory at Bardia enabled the Allied forces to continue the advance into Libya and ultimately capture almost all of Cyrenaica. In turn this would lead to German intervention in the fighting in North Africa, changing the nature of the war in that theatre. Bardia boosted the competence and reputation of the Australian Army. Perhaps most important of all, it raised confidence in the possibility of an ultimate Allied victory around the world, which would lead to the Lend-Lease Act being passed in the United States.
Background
Italian invasion of Egypt
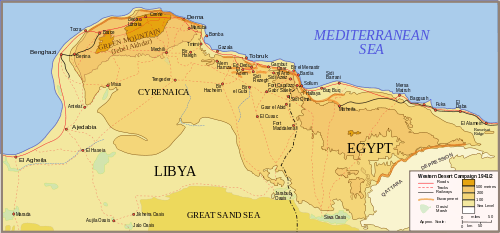
Italy declared war on the United Kingdom on 10 June 1940.[5] Bordering on the Italian colony of Libya was the Kingdom of Egypt. Although a neutral country, Egypt was occupied by the British under the terms of the Anglo-Egyptian Treaty of 1936, which allowed British military forces to occupy Egypt if the Suez Canal was threatened.[6] A series of cross-border raids and skirmishes began on the frontier between Libya and Egypt. On 13 September 1940, an Italian force advanced across the frontier into Egypt, reaching Sidi Barrani on 16 September,[7] where the advance was halted until logistical difficulties could be overcome.[8]
Italy's position in the centre of the Mediterranean made it unacceptably hazardous to send ships from Britain to the Middle East via that route, so British reinforcements and supplies for the area had to travel around the Cape of Good Hope. For this reason, it was more convenient to reinforce General Sir Archibald Wavell's Middle East Command with troops from Australia, New Zealand and India. Nonetheless, even when Britain was threatened with invasion after the Battle of France and equipment was urgently required to re-equip the British Expeditionary Force after its losses in the Dunkirk evacuation, troops and supplies were still despatched to the Middle East Command. A convoy that departed the United Kingdom in August 1940 brought guns, stores, ammunition, and three armoured regiments, including the 7th Royal Tank Regiment, equipped with Matilda II tanks.[9]
On 9 December 1940 the Western Desert Force under the command of Major General Richard O'Connor attacked the Italian position at Sidi Barrani. The position was captured, 38,000 Italian soldiers were taken prisoner, and the remainder of the Italian force was driven back.[10] The Western Desert Force pursued the Italians into Libya, and the 7th Armoured Division established itself to the west of Bardia, cutting off land communications between the strong Italian garrison there and Tobruk.[11] On 11 December, Wavell decided to withdraw the 4th Indian Division and send it to the Sudan to participate in the East African Campaign. Major General Iven Mackay's 6th Australian Division was brought forward from Egypt to replace it.[12] Mackay assumed command of the area on 21 December 1940.[13]
Geography
Unlike the Great Sand Sea, the coastal portion of the Libyan Desert is stony rather than sandy, but it is no less arid, and supports little vegetation. Close to the coast, the ground was broken by wadis. Military vehicles could traverse the stony desert with little difficulty, although the heat, dust and wind caused their rapid deterioration. Because it was so thinly populated, bombs and shells could be used with minimal risk of civilian casualties. Winter nights could be bitterly cold, yet the days could still be uncomfortably hot. There was almost no food or water, and little shelter from the cold, the heat or the wind. The desert was, however, relatively free from disease.[14]
Planning and preparation
Italian
After the disaster at Sidi Barrani and the withdrawal from Egypt, Lieutenant General Annibale Bergonzoli's XXIII Corps faced the British from within the strong defences of Bardia. Mussolini wrote to Bergonzoli: "I have given you a difficult task but one suited to your courage and experience as an old and intrepid soldier—the task of defending the fortress of Bardia to the last. I am certain that 'Electric Beard' and his brave soldiers will stand at whatever cost, faithful to the last." Bergonzoli replied: "I am aware of the honour and I have today repeated to my troops your message — simple and unequivocal. In Bardia we are and here we stay."[15]
Bergonzoli had approximately 45,000 defenders under his command.[2] The Italian divisions defending the perimeter of Bardia included remnants of four divisions. The northern ("Gerfah") sector was held by the 2nd "28 October" Blackshirt Division; the centre ("Ponticelli") sector by the 1st "23 March" Blackshirt Division and elements of the 62nd "Marmarica" Infantry Division; and the southern ("Mereiga") sector by the 63rd "Cirene" Infantry Division and the rest of the 62nd "Marmarica" Infantry Division.[16] Bergonzoli also had the remnants of the disbanded 64th "Catanzaro" Infantry Division, some 6,000 Frontier Guard (GaF) troops, three companies of Bersaglieri, part of the dismounted Vittorio Emanuele cavalry regiment, and a machine gun company of the 60th "Sabratha" Infantry Division.[17]
These divisions guarded an 18-mile (29 km) perimeter which had an almost continuous antitank ditch, extensive barbed wire fence, and a double row of strong points. The strong points were situated approximately 800 yards (730 m) apart. Each had its own antitank ditch, concealed by thin boards. They were each armed with one or two 47 mm antitank guns and two to four machine guns. The weapons were fired from concrete sided pits connected by trenches to a deep underground concrete bunker which offered protection from artillery fire. However, the trenches had no fire steps and the weapons pits lacked overhead cover. Each post was occupied by a platoon or company. The inner row of posts were similar, except that they lacked the antitank ditches. The posts were numbered sequentially from south to north, with the outer posts bearing odd numbers and the inner ones even numbers. The actual numbers were known to the Australians from the markings on maps captured at Sidi Barrani and were also displayed on the posts themselves.[18] In the southern corner was a third line of posts, known as the Switch Line. There were six defensive minefields, and a scattering of mines in front of some other posts.[13] The major tactical defect of this defensive system was that if the enemy broke through, the posts could be picked off individually from the front or rear.[19]
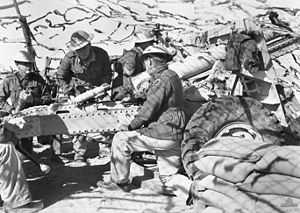
The defence was supported by a strong artillery component that included 41 Breda Model 35 20 mm antiaircraft guns; 85 47 mm antitank guns; 26 Solothurn S-18/1000 anti-tank rifles; 41 Cannone da 65/17 modello 13 65 mm infantry support guns; 147 Cannone da 75/32 modello 37 75 mm and 77 mm field guns; 76 Skoda 100 mm Model 1916 and Canon de 105 mle 1913 Schneider 105 mm guns; and 27 120 mm and Obice da 149/12 modello 14 149 mm medium howitzers.[20] The large number of different gun models, many of them quite old, created difficulties with the supply of spare parts. The older guns often had worn barrels, which caused problems with accuracy. Ammunition stocks were similarly old and perhaps as many as two-thirds of the fuses were out of date, resulting in excessive numbers of dud rounds.[21] There were also multiple models of machine guns, with seven different types of ammunition in use. The Breda 30, the principal light machine gun, had a low rate of fire and a reputation for jamming. The Fiat-Revelli Modello 1914 was a bulky and complicated weapon that was also prone to stoppages. Some of these had been rebuilt as Fiat-Revelli Modello 1935s which, while an improvement, were still unreliable. The principal medium machine gun, the Breda M37, had its shortcomings, the main one being that it used 20-round strips of cartridges, which gave it a reduced rate of fire.[22] Shortages of raw materials, coupled with the increased technological sophistication of modern weapons, led to production problems that frustrated efforts to supply the entire Italian Army with the best available equipment.[23] The result was that the firepower of the Italian defenders was neither as great nor as effective as it should have been.[24]
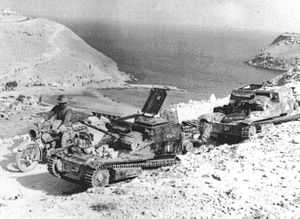
As a "mobile reserve" there were 13 M13/40 medium tanks and 115 L3/35 tankettes.[25] While the L3s were generally worthless, the M13/40s were effective medium tanks with four machine guns and a turret-mounted 47 mm antitank gun for its main armament that were "in many ways the equal of British armoured fighting vehicles".[26] However, their 20 mm armour, while much thicker than that of the tankettes, could still be penetrated by the British 2 pounder and the tankettes were no match for the British Matildas in either armour or firepower. None of the tanks at Bardia were fitted with a radio, making a coordinated counter-attack difficult.[25]
Bergonzoli knew that if Bardia and Tobruk held out, a British advance further into Libya eventually must falter under the logistical difficulties of maintaining a desert force using an extended overland supply line.[27] Not knowing how long he had to hold out, Bergonzoli was forced to ration his stocks of food and water so that O'Connor could not simply starve him out. Consequently, hunger and thirst adversely affected the morale of the Italian defenders that had already been shaken by the defeat at Sidi Barrani.[28] So too did medical conditions undermine morale, particularly lice and dysentery, the results of poor sanitation.[29]
Allied
The 6th Division had been formed in September 1939 as part of an expeditionary force, the Second Australian Imperial Force.[30] Prime Minister Robert Menzies ordered that all commands in the division were to go to reservists rather than to regular officers,[31] who had been publicly critical of the defence policies of right wing politicians.[32] These policies favoured the Royal Australian Navy, which received the majority of defence spending in the interwar period.[33] The result was that when war came, the Army's equipment was of World War I vintage, and its factories were only capable of producing small arms. Fortunately, these World War I-era small arms, the Lee-Enfield rifle and the Vickers machine gun, were solid and reliable weapons that would remain in service throughout the war; they were augmented by the more recent Bren light machine gun. Most other equipment was obsolescent and would have to be replaced, but new factories were required to produce the latest items, such as 3-inch mortars, 25-pounders and motor vehicles, and War Cabinet approval for their construction was slow in coming.[34] The 6th Division's training in Palestine, while "vigorous and realistic", was therefore hampered by shortages of equipment. These shortages were gradually remedied by deliveries from British sources.[35] Similarly, No. 3 Squadron RAAF had to be sent to the Middle East without aircraft or equipment, which had to be supplied by the Royal Air Force, at the expense of its own squadrons.[36]
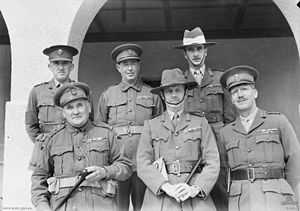
Despite the rivalry between regular and reserve officers, the 6th Division staff was an effective organisation. Brigadier John Harding, the chief of staff of XIII Corps, as the Western Desert Force was renamed on 1 January 1941,[35] had been a student at Staff College, Camberley along with Mackay's chief of staff, Colonel Frank Berryman, at a time when O'Connor had been an instructor there.[37] Harding later considered the 6th Division staff "as good as any that I came across in that war, and highly efficient."[38] Australian doctrine emphasised the importance of initiative in its junior leaders and small units were trained in aggressive patrolling, particularly at night.[39]
As it moved into position around Bardia in December 1940, the 6th Division was still experiencing shortages. It had only two of its three artillery regiments, and only the 2/1st Field Regiment was equipped with the new 25-pounders, which it had only received that month. The 2/2nd Field Regiment was still equipped with twelve 18-pounders and twelve 4.5-inch howitzers.[40] Only A Squadron of the 2/6th Cavalry Regiment was on hand, as the rest of the regiment was deployed in the defence of the frontier posts at Al-Jaghbub and Siwa Oasis.[35] The 2/1st Machine Gun Battalion had been diverted to Britain. Its place was taken by a British Army machine-gun battalion, the 1st Northumberland Fusiliers. The 2/1st Antitank Regiment had likewise been diverted, so each infantry brigade had formed an antitank company; but 2-pounders were in short supply, and only eleven guns were available instead of the 27 required. The infantry battalions were particularly short of mortars, and ammunition for the Boys anti-tank rifle was in short supply.[40]
To make up for this, O'Connor augmented Brigadier Edmund Herring's 6th Division Artillery with part of the XIII Corps artillery: the 104th (Essex Yeomanry) Regiment, Royal Horse Artillery, equipped with sixteen 25 pounders; F Battery, Royal Horse Artillery, with twelve; the 51st Field Regiment, Royal Artillery, with twenty four; and the 7th Medium Regiment, Royal Artillery, which was equipped with two 60-pounders, eight 6-inch howitzers, and eight 6-inch guns. There were also two antitank regiments, the 3rd and 106th Regiments, Royal Horse Artillery, equipped with 2-pounders and Bofors 37 mm guns.[41]
Italian gun positions were located using sound ranging by the British 6th Survey Regiment, Royal Artillery.[42] These positions disclosed themselves by firing at Australian patrols, which now went out nightly, mapping the antitank ditch and the barbed wire obstacles.[43] Aerial photographs of the positions were taken by Westland Lysander aircraft of No. 208 Squadron RAF, escorted by Gloster Gladiator biplane fighters of No. 3 Squadron RAAF.[44] British Intelligence estimated the strength of the Italian garrison at 20 to 23,000 with 100 guns, and discounted reports of six medium and seventy light tanks as exaggerated—a serious intelligence failure.[41]
At a meeting with Mackay on Christmas Eve, 1940, O'Connor visited Mackay at 6th Division headquarters and directed him to prepare an attack on Bardia. O'Connor recommended that this be built around the 23 Matilda tanks of Lieutenant Colonel R. M. Jerrram's 7th Royal Tank Regiment that remained in working order. The attack was to be made with only two brigades, leaving the third for a subsequent advance on Tobruk. Mackay did not share O'Connor's optimism about the prospect of an easy victory and proceeded on the assumption that Bardia would be resolutely held, requiring a well-planned attack similar to that required to breach the Hindenburg Line in 1918.[45] The plan developed by Mackay and his chief of staff, Colonel Frank Berryman, involved an attack on the western side of the Bardia defences by Brigadier Arthur "Tubby" Allen's 16th Infantry Brigade at the junction of the Gerfah and Ponticelli sectors. Attacking at the junction of two sectors would confuse the defence. The defences here were weaker than in the Mereiga sector, the ground was favourable for employment of the Matilda tanks, and good observation for the artillery was possible. There was also the prospect that an attack here could split the fortress in two.[46] Brigadier Stanley Savige's 17th Infantry Brigade would then exploit the breach in the fortress defences in the second phase. Most of the artillery, grouped as the "Frew Group" under British Lieutenant Colonel J. H. Frowen, would support the 16th Infantry Brigade; the 17th would be supported by the 2/2nd Field Regiment. In the event, the artillery density—96 guns for an attack on an 800-yard (730 m) front—was comparable to the Battle of St. Quentin Canal in September 1918, when 360 guns supported an attack on a 7,000-yard (6,400 m) front.[47] Mackay insisted that the attack required 125 rounds per gun. It had to be postponed to 3 January in order for this ammunition to be brought forward.[48]
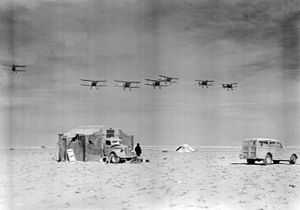
Much depended on the Western Desert Force's ability to move fuel, water and supplies forward. The 6th Division's Assistant Adjutant General and Quartermaster General (AA&QMG), Colonel George Alan Vasey declared: "This is a Q war."[49] Captured Italian vehicles and fuel were used to haul supplies where possible. On 12 December, a Reserve Mechanical Transport company took over 80 Italian 5- and 6-ton diesel trucks that had been captured at Sidi Barrani. They were joined on 15 December by 50 7½-ton trucks that arrived from Palestine. However, the British were unfamiliar with diesel engines, and a lack of spare parts, indifferent maintenance, and hard use under desert conditions soon took their toll, leading to many breakdowns. By the end of December the Western Desert Force's vehicle fleet was only 40% of its establishment strength.[50]
Supplies were stocked at 8 Field Supply Depot at Sallum, where a jetty was constructed by the Royal Engineers.[51] Troops of the British 16th Infantry Brigade began working the port on 18 December. They were soon joined by two pioneer companies of the Cyprus Regiment and a pioneer detachment from the Palestine Regiment. Stores were hauled to 8 Field Supply Depot by the New Zealand 4th Mechanical Transport Company.[46]
The port was subject to long range shelling by medium guns in Bardia, known to the Australians as "Bardia Bill",[52] and to Italian air attacks. Only one antiaircraft battery could be spared for Sallum. An air raid on Christmas Eve killed or wounded 60 New Zealanders and Cypriots. Without a proper warning network, interception was very difficult.[46] However on 26 December eight Gloster Gladiators of No. 3 Squadron RAAF sighted and attacked ten Savoia-Marchetti SM.79 bombers escorted by 24 Fiat CR.42 biplane fighters over the Gulf of Sallum. The Australians claimed to have shot down two CR 42s, while three Gladiators were damaged.[44]
On 23 December the water carrier Myriel arrived at Sallum with 3,000 tons of water, while the monitor HMS Terror brought another 200 tons.[46] The water was taken to storage tanks at Fort Capuzzo. Efforts were made to stock 8 Field Supply Depot with seven days' supply of fuel and stores, and 500 rounds per gun of ammunition. The effort to do so proceeded satisfactorily despite Italian air raids and blinding sand storms.[51] Last-minute efforts were made to rectify the 6th Division's remaining equipment shortages. Over the last few days before the battle, some 95 additional vehicles were obtained, of which 80 were assigned to hauling ammunition. A consignment of 11,500 sleeveless leather jerkins for protection against the cold and barbed wire were distributed, as were 350 sets of captured Italian wire cutters. The 17th Infantry Brigade finally received its 3-inch mortars but found them lacking their sights. An officer dashed back to Cairo to obtain these in time. Some 300 pairs of gloves and 10,000 yards (9,100 m) of marking tape arrived with only hours to go. The gloves were distributed, but the tape did not reach the 16th Infantry Brigade in time, so rifle cleaning flannelette was torn into strips and used instead.[53]
Battle
Air and naval operations
A series of air raids were mounted against Bardia in December, in the hope of persuading the garrison to withdraw. Once it became clear that the Italians intended to stand and fight, bombing priorities shifted to the Italian airbases around Tobruk, Derna and Benina.[44] Air raids on Bardia resumed in the lead-up to the ground assault, with 100 bombing sorties flown against Bardia between 31 December 1940 and 2 January 1941, climaxing with a particularly heavy raid by Vickers Wellington bombers of No. 70 Squadron RAF and Bristol Bombay bombers of No. 216 Squadron RAF on the night of 2/3 January 1941.[54] Lysanders of No. 208 Squadron RAF directed the artillery fire. Fighters from No. 33 Squadron RAF, No. 73 Squadron RAF and No. 274 Squadron RAF patrolled between Bardia and Tobruk.[55]
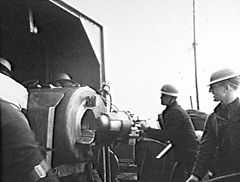
A naval bombardment was carried out on the morning of 3 January by the Queen Elizabeth-class battleships HMS Warspite, Valiant and Barham and their destroyer escorts. The aircraft carrier HMS Illustrious provided aircraft for spotting and fighter cover.[55] They withdrew after firing 244 15-inch (380 mm), 270 6-inch (150 mm) and 240 4.5-inch (110 mm) shells, handing over to HMS Terror and the Insect-class gunboats HMS Ladybird, Aphis and Gnat, which continued firing throughout the battle. At one point fire from Terror caused part of the cliff near the town to give way, taking Italian gun positions with it.[56]
Break in
The assault troops rose early on 3 January 1941, ate a meal and drank a tot of rum. The leading companies began moving to the start line at 0416. The artillery opened fire at 0530. On crossing the start line the 2/1st Infantry Battalion, under the command of Lieutenant Colonel Kenneth Eather, came under Italian mortar and artillery fire. The lead platoons advanced accompanied by sappers of the 2/1st Field Company carrying Bangalore torpedoes—12-foot (3.7 m) pipes packed with ammonal—as Italian artillery fire began to land, mainly behind them. An Italian shell exploded among a leading platoon and detonated a Bangalore torpedo, resulting in four killed and nine wounded. The torpedoes were slid under the barbed wire at 60 yards (55 m) intervals. A whistle was blown as a signal to detonate the torpedoes but could not be heard over the din of the barrage. Colonel Eather became anxious and ordered the engineering party nearest him to detonate their torpedo. This the other teams heard, and they followed suit.[57]
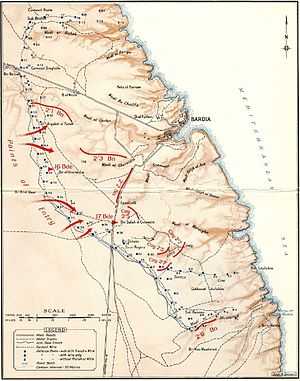
The infantry scrambled to their feet and rushed forward while the sappers hurried to break down the sides of the antitank ditch with picks and shovels.[58] They advanced on a series of posts held by the 2nd and 3rd Battalions of the Italian 115th Infantry Regiment.[59] Posts 49 and 47 were rapidly overrun, as was Post 46 in the second line beyond. Within half an hour Post 48 had also fallen and another company had taken Posts 45 and 44. The two remaining companies now advanced beyond these positions towards a low stone wall as artillery fire began to fall along the broken wire. The Italians fought from behind the wall until the Australians were inside it, attacking with hand grenades and bayonets. The two companies succeeded in taking 400 prisoners.[58]
Lieutenant Colonel F. O. Chilton's 2/2nd Infantry Battalion found that it was best to keep skirmishing forward throughout this advance, because going to ground for any length of time meant sitting in the middle of the enemy artillery concentrations that inflicted further casualties. The Australian troops made good progress, six tank crossings were readied and mines between them and the wire had been detected. Five minutes later, the 23 Matildas of the 7th Royal Tank Regiment advanced, accompanied by the 2/2nd Infantry Battalion. Passing through the gaps, they swung right along the double line of posts.[60]
At 0750 Lieutenant Colonel V. T. England's 2/3rd Infantry Battalion, accompanied by the Bren gun carriers of Major Denzil MacArthur-Onslow's A Squadron, 2/6th Cavalry Regiment moved off for Bardia. Major J. N. Abbot's company advanced to the Italian posts, and attacked a group of sangers. The Italian defenders were cleared with grenades. By 0920 all companies were on their objectives and they had linked with 2/1st Infantry Battalion. However, the Bren gun carriers encountered problems as they moved forward during the initial attack. One was hit and destroyed in the advance and another along the Wadi Ghereidia.[61] The 2/3rd Infantry Battalion was now assailed by half a dozen Italian M13/40 tanks who freed a group of 500 Italian prisoners. The tanks continued to rumble to the south while the British crews of the Matildas "enjoying a brew, dismissed reports of them as an Antipodean exaggeration".[62] Finally, they were engaged by an antitank platoon of three 2 pounders mounted on portees. Corporal A. A. Pickett's gun destroyed four of them until his portee was hit, killing one man and wounding Pickett. The survivors got the gun back into action and knocked out a fifth tank. The portee was again hit by fire from the sixth tank, fatally wounding another man; but it too was soon knocked out by another 2 pounder. By midday, 6,000 Italian prisoners had already reached the provosts at the collection point near Post 45, escorted by increasingly fewer guards whom the rifle companies could afford to detach.[63] The Italian perimeter had been breached and the attempt to halt the Australian assault at the outer defences had failed.[64]
Follow up
Major H. Wrigley's 2/5th Infantry Battalion of Brigadier Stanley Savige's 17th Infantry Brigade, reinforced by two companies of Lieutenant Colonel T. G. Walker's 2/7th Infantry Battalion, now took over the advance. The battalion's task was to clear "The Triangle", a map feature created by the intersection of three tracks north of Post 16. Wrigley's force had a long and exhausting approach, and much of its movement forward to its jump off point had been under Italian shellfire intended for the 16th Infantry Brigade. Awaiting its turn to move, the force sought shelter in Wadi Scemmas and its tributaries. Wrigley called a final coordinating conference for 1030, but at 1020 he was wounded by a bullet and his second in command, Major G. E. Sell took over. At the conference the forward observer from the 2/2nd Field Regiment reported that he had lost contact with the guns and could not call in artillery fire. A wounded British tank troop commander also reported that one of his tanks had been knocked out and the other three were out of fuel or ammunition. No tank support would be available until these had been replenished. Sell decided that the attack must be carried out without them.[65]
The artillery barrage came down at 1125, and five minutes later the advance began. The sun had now risen, and Captain C. H. Smith's D Company came under effective fire from machine guns and field artillery 700 yards (640 m) to the north east. Within minutes, all but one of the company's officers and all its senior non-commissioned officers had been killed or wounded. C Company's Captain W. B. Griffiths pulled his company back to the Wadi and called on a detachment of 3-inch mortars and a platoon of Vickers machine guns of the 1st Battalion, Northumberland Fusiliers to fire at the Italian positions. This proved effective, and Griffith's company and a platoon of A Company worked along the Wadi Scemmas, eventually collecting 3,000 prisoners.[66]
Meanwhile, Captain D. I. A. Green's B Company of the 2/7th Infantry Battalion had captured Posts 26, 27 and 24. After Post 24 had been taken, two Matildas arrived and helped to take Post 22. As the prisoners were rounded up, one shot Green dead, then threw down his rifle and climbed out of the pit smiling broadly. He was immediately thrown back and a Bren gun emptied into him. Lieutenant C. W. Macfarlane, the second-in-command, had to prevent his troops from bayoneting the other prisoners. The incident was witnessed by the Italians at Post 25 some 450 yards (410 m) away, who promptly surrendered. With the help of the Matildas, Macfarlane was able to quickly capture Posts 20 and 23. At this point, one tank ran out of ammunition; anti-tank fire already had blown off the track of another in the attack on Post 20. Nonetheless, Posts 18 and 21 were captured without armoured support, using the now-familiar tactics of grenades, wire cutting and assault. With darkness approaching, Macfarlane attempted to capture Post 16, but the defenders beat him off. He retired to Post 18 for the night.[67]
Upon hearing of the losses to the 2/5th Infantry Battalion, Brigade Major G. H. Brock sent Captain J. R. Savige's A Company of the 2/7th Infantry Battalion to take "The Triangle". Savige gathered his platoons and with fire support, from machine guns, attacked the objective, 3,000 yards (2,700 m) away. The company captured eight field guns, many machine-guns and nearly 200 prisoners on the way, but casualties and the need to detach soldiers as prisoner escorts left him with only 45 men at the end of the day.[68]
Lieutenant Colonel A. H. L. Godfrey's 2/6th Infantry Battalion was supposed to "stage a demonstration against the south west corner of the perimeter",[69] held by the 1st Battalion, Italian 158th Infantry Regiment and 3rd Battalion, Italian 157th Infantry Regiment.[59] Instead, in what military historians consider one of the most "disastrous example of a CO seeking to make his mark",[70] Godfrey decided instead to launch an attack, in defiance of the clear instructions he had received, and against all basic military logic and common sense.[71] Although poorly planned and executed,[72] Godfrey's attack managed to capture Post 7 and part of Post 9, but Post 11 resisted stubbornly.[73]
That evening, Brigadier Savige came forward to the 2/5th Infantry Battalion's position to determine the situation, which he accurately evaluated as "extremely confused; the attack was stagnant."[74] Savige adopted a plan of Walker's for a night attack, which began at 1230. Macfarlane advanced on Post 16. He sent a platoon around the flank to silently cut the wire on the western side, while he led another platoon against the northern side. A Bren gunner opening fire prematurely, alerting the defenders, but Macfarlane's men were able to overrun the post. The same tactic was used to capture Post R11. Macfarlane was supposed to capture Post R9, but was unable to find it in the dark. His troops attempted to capture it at dawn, but the defenders were alert and they responded with heavy fire. With the help of a 2-inch mortar, the second attempt was successful.[75]
Meanwhile, Captain G. H. Halliday's D Company moved southwards against Post 19. He drew the defenders' attention with a demonstration by one platoon in front of the post while the rest of the company moved around the post and attacked silently from the rear. This maneuver took the defenders by surprise and D Company captured the post—and 73 prisoners—at 0230. Halliday repeated this tactic against Post 14, which was taken at 0400 with 64 prisoners. Capturing the two posts cost one Australian killed and seven wounded. A third attempt against Post 17 failed: the previous attacks had alerted the post and D Company came under heavy mortar and machine gun fire. A furious battle raged until the post fell shortly before dawn. Another 103 Italians were captured at a cost of two Australians killed and nine wounded. Between casualties and men detached as prisoner escorts, D Company strength fell to 46 men, and Halliday elected to halt for the night.[76]
Although the Australian progress had been slower than that achieved during the break-in phase, the 17th Infantry Brigade had achieved remarkable results. Another ten posts, representing 3 kilometres (1.9 mi) of perimeter had been captured, the Switch Line had been breached, and thousands of Italian defenders had been captured. For the Italians, halting the Australian advance would be an immensely difficult task.[77]
Bardia falls
On the afternoon of 3 January, Berryman met with Allen, Jerram and Frowen at Allen's headquarters at Post 40 to discuss plans for the next day. It was agreed that Allen would advance on Bardia and cut the fortress in two, supported by Frowen's guns, every available tank, MacArthur-Onslow's Bren gun carriers and the 2/8th Infantry Battalion, which Mackay had recently allocated from reserve. Allen gave orders accordingly. During the afternoon the 6th Cavalry Regiment was pulled back to become the brigade reserve and the 2/5th Infantry Battalion relieved the 2/2nd to free it to advance the next day. That evening, Berryman came to the conclusion that unless the Italian defence collapsed soon, the 16th and 17th Infantry Brigades would become incapable of further effort and Brigadier Horace Robertson's 19th Infantry Brigade would be required. Mackay was more sanguine about the situation, and reminded Berryman that his orders had been to capture Bardia with only two brigades. While they were discussing the matter, O'Connor and Harding arrived at 6th Division headquarters, and O'Connor readily agreed to the change of plan.[78]
The 2/1st Infantry Battalion began its advance on schedule at 0900, but the lead platoon came under heavy machine gun fire from Post 54, and Italian artillery knocked out the supporting mortars. The 3rd Regiment Royal Horse Artillery engaged the Italian guns and the platoon withdrew. Colonel Eather then organised a formal attack on Post 54 for 1330, following a bombardment of the post by artillery and mortars.[79] The Italian guns were silenced when an Australian shell detonated a nearby ammunition dump. The Australians then captured the post. About a third of its defenders had been killed in the fighting. The remaining 66 surrendered.[80] This prompted a general collapse of the Italian position in the north. Posts 56 and 61 surrendered without a fight and white flags were raised over Posts 58, 60, 63 and 65, and the gun positions near Post 58.[79] By nightfall, Eather's men had advanced as far as Post 69 and only the fourteen northernmost posts still held out in the Gerfan sector.[80]
Colonel England's 2/3rd Infantry Battalion was supported by the guns of the 104th Regiment Royal Horse Artillery and a troop of the 7th Royal Tank Regiment. The tanks were late in arriving, and England postponed his attack to 1030. The battalion came under artillery fire, mostly from a battery north of Bardia that was then engaged and silenced by the 104th Regiment Royal Horse Artillery. The advance resumed, only to come under machine gun and artillery fire from Wadi el Gerfan.[81] An eight-man section under Lance Corporal F. W. Squires was sent to reconnoitre the wadi but attacked a battery position instead and returned with 500 prisoners. The wadi was found to contain large numbers of Italian soldiers from technical units who, untrained for combat, surrendered in large numbers. One company captured over 2,000 prisoners, including 60 officers.[82]
The brigade major, Major I. R. Campbell, ordered MacArthur-Onslow, whose carriers were screening England's advance, to seize Hebs el Harram, the high ground overlooking the road to the township of Bardia. MacArthur-Onslow's carriers discovered an Italian hospital with 500 patients, including several Australians, and 3,000 unwounded Italians. Leaving a small party at the hospital under Corporal M. H. Vause, who could speak some Italian, MacArthur-Onslow pressed on with two carriers to the Hebs el Harram, where they took over 1,000 prisoners. The tanks and the remainder of A Squadron continued along the road to Bardia under intermittent artillery fire, followed by C Company of the 2/3rd Infantry Battalion. The column entered the town at 1600, its tanks firing the occasional shot.[83]
The 2/2nd Infantry Battalion, supported by the three Matilda tanks and the guns of the 7th Medium Regiment, advanced down the Wadi Scemmas towards an Italian fort on the southern headland of Bardia. After some hours of climbing, the 2/2nd reached the headland and attacked the fort at 1645. Inside the fort were two 6 inch guns, two field guns and five other guns of the fort. Fortunately, the 6 inch guns were for coastal defence and were unable to fire inland. One of the tanks made straight for the gate of the fort. The Italians opened the gate, and the tanks moved inside, taking the garrison of 300 prisoners. D Company then followed a goat track that led to lower Bardia. Thousands of prisoners were taken, most from service units. Two carriers of the 2/5th Infantry Battalion patrolling near the coast captured 1,500 prisoners. Captain N. A. Vickery, a forward observer from the 2/1st Field Regiment, attacked an Italian battery in his Bren gun carrier and captured 1,000 prisoners.[84]
By the end of the second day, tens of thousands of defenders had been killed or captured. The remaining garrisons in the Gerfan and Ponticelli sectors were completely isolated. The logistical and administrative units were being overrun.[85] Recognising that the situation was hopeless, General Bergonzoli and his staff had departed on foot for Tobruk during the afternoon, in a party of about 120 men.[86] General Giuseppe Tellera, the commander of the Italian Tenth Army, considered the possibility of sending a force to relieve the Bardia fortress but in the end concluded that such an operation had no chance of success.[87]
Final drive
On the morning of 5 January, the 19th Infantry Brigade launched its attack on the Meriega sector, starting from the Bardia road and following a creeping barrage southward with the support of six Matilda tanks, all that remained in working order. The others had been hit by shells, immobilised by mines, or had simply broken down.[88] The company commanders of the lead battalion, the 2/11th Infantry Battalion, did not receive their final orders until 45 minutes before start time, at which point the start line was 3 miles (4.8 km) away. As a consequence, the battalion arrived late, and the intended two company attack had to be carried out by just one: Captain Ralph Honner's C Company, albeit with all six Matildas at his disposal. Honner's men had to literally chase the barrage, and had only just caught up with it before it ceased. As they advanced, they came under fire from the left, the right, and in front of them, but casualties were light. Most positions surrendered when the infantry and tanks came close, but this did not reduce the fire from posts further away.[89] By 1115, C Company had reached the Switch Line and captured Post R5 and then R7. B Company, following on the left, cleared Wadi Meriega, capturing Lieutenant General Ruggero Tracchia and Brigadier General Alessandro de Guidi, the commanders of the 62nd and 63rd Infantry Divisions respectively. At this point, Honner stopped to consolidate his position and allow Lieutenant Colonel Ivan Dougherty's 2/4th Infantry Battalion to pass through. However, Honner took the surrender of Posts 1, 2 and 3 and his men did not stop advancing.[90]
Meanwhile, the Italian garrisons in the north were surrendering to the 16th Infantry Brigade and the Support Group of the 7th Armoured Division outside the fortress;[88] the 2/8th Infantry Battalion had taken the area above Wadi Meriega; and the 2/7th Infantry Battalion had captured Posts 10, 12 and 15. Colonel Godfrey was astonished to discover that the 2/11th Infantry Battalion had captured Post 8. The carrier platoon of the 2/6th Infantry Battalion attacked and captured Post 13 while the 2/11th captured Post 6. The only post still holding out was now Post 11. The 2/6th Infantry Battalion renewed its attack, with the infantry attacking from the front and its carriers attacking from the rear. They were joined by Matildas from the vicinity of Post 6. At this point the Italian post commander, who had been wounded in the battle, lowered his flag and raised a white one. Some 350 Italian soldiers surrendered at Post 11. Inside, the Australians found two field guns, 6 antitank guns, 12 medium machine guns, 27 light machine guns, and two 3 inch mortars. Godfrey sought out the Italian post commander—who wore a British Military Cross earned in the First World War—and shook his hand.[91] "On a battlefield where Italian troops won little honour", Gavin Long later wrote, "the last to give in belonged to a garrison whose resolute fight would have done credit to any army."[92]
Aftermath
Analysis
The victory at Bardia enabled the Allied forces to continue the advance into Libya and ultimately capture almost all of Cyrenaica.[88] As the first battle of the war to be commanded by an Australian general, planned by an Australian staff, and fought by Australian troops, Bardia was naturally of great interest to the public in Australia.[93] Congratulatory messages poured in.[94] AIF recruitment surged in the wake of the news of the victory.[95] War correspondent John Hetherington reported that: "Men who since childhood had read and heard of the exploits in battle of the First AIF, who had enlisted and trained under the shadow of their fathers' reputation as soldiers, had come through their ordeal of fire and built a reputation of their own."[96]
In the neutral United States, newspapers praised the 6th Division. Favourable articles appeared in The New York Times and the Washington Times-Herald, which ran the headline "Hardy Wild-Eyed Aussies Called World's Finest Troops". An article in the Chicago Daily News told its readers that Australians "in their realistic attitude towards power politics, prefer to send their boys to fight far overseas rather than fighting a battle in the suburbs of Sydney".[97] Even while the battle was raging, Wavell had received a cable from General Sir John Dill stressing the political importance of such victories in the United States, where President Franklin D. Roosevelt was attempting to get the Lend-Lease Act passed. It was finally enacted in March 1941.[98]
Mackay wrote in a diary note on 6 January: "Germans cannot possibly keep out of Africa now."[99] In Germany, the Chancellor, Adolf Hitler, was unconcerned by the military implications of the loss of Libya, but deeply troubled by the prospect of a political reverse that could lead to the fall of Mussolini. On 9 January 1941, he revealed his intention to senior members of the Wehrmacht to send German ground troops to North Africa, in what became Unternehmen Sonnenblume (Operation Sunflower). Henceforth, German troops would play an important role in the fighting in North Africa.[100]
Within the 6th Division, there were recriminations over what was seen as Berryman's favouritism towards Robertson, a fellow regular soldier and Royal Military College, Duntroon graduate, in an effort to prove that regular officers could command troops. Savige felt that some of the 17th Infantry Brigade's difficulties were of Berryman's making, through an over-prescriptive and complicated battle plan.[101] In many ways the 6th Division was fortunate to have drawn a "set piece" type of battle, the type that most suited its Great War-based doctrine and training.[102] At the same time, confidence and experience was generated, and leaders and staffs took away important tactical lessons from the battle.[103] Gavin Long considered Bardia "a victory for bold reconnaissance, for audacious yet careful planning, for an artillery scheme which subdued the enemy's fire at the vital time, and a rapid and continuing infantry assault which broke a gap in the enemy's line."[104] To attribute success to the tanks or artillery, he felt, was "to present Hamlet without the prince."[104]
Australian historian Craig Stockings highlighted that the Italians were hampered by a faulty defensive concept and poorly designed and constructed outposts, were weakened by previous casualties, inappropriate doctrine, inferior weaponry (particularly artillery), and an inability to counter British armour. All contributed to their defeat.[105] Although a significant victory, the belief that the Australians had forced their way through "impenetrable" Italian fortifications against overwhelming odds and numerical disadvantage, is incorrect with the bulk of the Italian garrison placed in the rear. Indeed the numerical and technical edge at the point of battle, continued Stockings, "was more often than not in favour of the attackers themselves."[106] Therefore, concluded Stockings, the idea that had subsequently arisen in the ANZAC tradition that it was a "David and Goliath" struggle between a small band of resolute attackers against hordes of Italian defenders as presented in history books, is simply not true. Moreover, when the battle is critically and dispassionately analysed "Anzac-oriented explanations are found wanting."[107] Rather, the importance of the Battle of Bardia lay in the challenge it might represent to the wider field of Australian military history and its historians "when national mythology meets military history."[108]
Axis forces later reoccupied the town during the offensive in Cyrenaica in April 1941. Further fighting subsequently occurred between 31 December 1941 and 2 January 1942 before Bardia was re-taken by the South African 2nd Infantry Division.[109][110] Bardia again changed hands in June 1942, being occupied by Axis forces for a third time, but was abandoned without contest in November following the Allied victory at El Alamein.[109]
Casualties
An estimated 36,000 Italian soldiers were captured at Bardia and a further 1,000 killed and 3,000 wounded.[4] Only a few thousand—including General Bergonzoli and three of his division commanders—escaped to Tobruk on foot or in boats. In addition, the Allies captured 26 coast defence guns, 7 medium guns, 216 field guns, 146 antitank guns, 12 medium tanks and 115 L3s, and perhaps most important of all, 708 vehicles.[2] Australian losses totalled 130 dead and 326 wounded.[3]
Base development
Bardia did not become an important port. Maintenance by sea continued to run through Salum.[111] However, Bardia became an important source of water. The large pumping station that the Italians had installed to serve the township and Fort Capuzzo was found damaged but was soon repaired.[112]
Notes
- ↑ Stockings 2009, p. 3
- ↑ 2.0 2.1 2.2 Long 1952, p. 199
- ↑ 3.0 3.1 Long 1952, p. 203
- ↑ 4.0 4.1 Stockings 2009, p. 276
- ↑ Long 1952, p. 82
- ↑ Gwyer 1964, p. 165
- ↑ Wavell 1946, pp. 3000–3001
- ↑ Stockings 2009, p. 63
- ↑ Playfair et al. 1954, pp. 190–192
- ↑ Long 1952, pp. 133–139
- ↑ Long 1952, pp. 140–141
- ↑ Playfair et al. 1954, p. 271
- ↑ 13.0 13.1 Playfair et al. 1954, p. 282
- ↑ Long 1952, pp. 146–147
- ↑ Long 1952, p. 201
- ↑ Stockings 2009, p. 121
- ↑ Stockings 2009, p. 115
- ↑ Long 1952, pp. 147–148
- ↑ Stockings 2009, pp. 323–324
- ↑ Stockings 2009, p. 116
- ↑ Stockings 2009, p. 335
- ↑ Stockings 2009, p. 340
- ↑ Schreiber, Stegemann & Vogel 1995, pp. 72–73
- ↑ Stockings 2009, pp. 336–337
- ↑ 25.0 25.1 Stockings 2009, pp. 327–330
- ↑ Schreiber, Stegemann & Vogel 1995, p. 75
- ↑ Stockings 2009, pp. 118–119
- ↑ Stockings 2009, pp. 315–316
- ↑ Stockings 2009, p. 320
- ↑ Long 1952, pp. 54–55
- ↑ Long 1952, pp. 44–45
- ↑ Long 1952, pp. 18–20
- ↑ Long 1952, pp. 9–14
- ↑ Long 1952, pp. 40–41
- ↑ 35.0 35.1 35.2 Playfair et al. 1954, p. 283
- ↑ Herington 1954, p. 57
- ↑ Long 1952, p. 190
- ↑ Stockings 2009, p. 372
- ↑ Long 1952, pp. 129–130
- ↑ 40.0 40.1 Long 1952, p. 146
- ↑ 41.0 41.1 Long 1952, p. 155
- ↑ Long 1952, p. 158
- ↑ Long 1952, pp. 148–151
- ↑ 44.0 44.1 44.2 Herington 1954, p. 64
- ↑ Stockings 2009, pp. 122–123
- ↑ 46.0 46.1 46.2 46.3 Playfair et al. 1954, p. 280
- ↑ Long 1952, pp. 158–159
- ↑ Long 1952, p. 156
- ↑ Long 1952, p. 161
- ↑ Playfair et al. 1954, p. 279
- ↑ 51.0 51.1 Carter & Kann 1952, pp. 110–112
- ↑ Long 1952, pp. 157–158
- ↑ Long 1952, p. 162
- ↑ Playfair et al. 1954, p. 284
- ↑ 55.0 55.1 Playfair et al. 1954, p. 286
- ↑ Stockings 2009, pp. 355–356
- ↑ Long 1952, pp. 164–165
- ↑ 58.0 58.1 Long 1952, pp. 165–166
- ↑ 59.0 59.1 Italy 1979, p. 149
- ↑ Long 1952, pp. 166–168
- ↑ Long 1952, pp. 169–170
- ↑ Stockings 2009, p. 170
- ↑ Long 1952, pp. 172–173
- ↑ Stockings 2009, p. 160
- ↑ Stockings 2009, pp. 199–203
- ↑ Long 1952, pp. 174–177
- ↑ Stockings 2009, pp. 209–211
- ↑ Stockings 2009, pp. 213–214
- ↑ Long 1952, p. 313
- ↑ Pratten 2009, p. 96
- ↑ Stockings 2009, p. 179
- ↑ Stockings 2009, p. 198
- ↑ Long 1952, p. 188
- ↑ Long 1952, p. 180
- ↑ Long 1952, pp. 181–182
- ↑ Stockings 2009, p. 218
- ↑ Stockings 2009, pp. 220–221
- ↑ Long 1952, pp. 189–190
- ↑ 79.0 79.1 Long 1952, pp. 194–195
- ↑ 80.0 80.1 Stockings 2009, p. 226
- ↑ Stockings 2009, pp. 232–233
- ↑ Long 1952, p. 193
- ↑ Long 1952, p. 195
- ↑ Long 1952, pp. 192–193
- ↑ Stockings 2009, pp. 237–238
- ↑ Italy 1979, p. 151
- ↑ Italy 1979, pp. 152–153
- ↑ 88.0 88.1 88.2 Playfair et al. 1954, p. 287
- ↑ Long 1952, pp. 196–197
- ↑ Stockings 2009, pp. 255–257
- ↑ Stockings 2009, pp. 257–262
- ↑ Long 1952, p. 198
- ↑ Stockings 2009, p. 2
- ↑ Stockings 2009, p. 269
- ↑ Stockings 2009, p. 274
- ↑ Hasluck 1952, p. 312
- ↑ Chapman 1975, p. 189
- ↑ Stockings 2009, p. 275
- ↑ Chapman 1975, p. 190
- ↑ Schreiber, Stegemann & Vogel 1995, pp. 654–657
- ↑ Stockings 2009, pp. 270–273
- ↑ Stockings 2009, pp. 378–379
- ↑ Long 1952, pp. 303–304
- ↑ 104.0 104.1 Long 1952, p. 205
- ↑ Stockings 2009, pp. 403–404
- ↑ Stockings 2010, p. 111
- ↑ Stockings 2010, p. 112
- ↑ Stockings 2010, pp. 111–112
- ↑ 109.0 109.1 "Battle of Bardia". Australian Military Units. Australian War Memorial. Retrieved 28 December 2014.
- ↑ Loughnan 1963, pp. 149–168
- ↑ Playfair et al. 1954, pp. 289–290
- ↑ Packenham-Walsh 1958, p. 238
References
- Carter, J. A. H.; Kann, D. N. (1952), Maintenance in the Field (1939–1942), The Second World War, Army I, London: War Office, OCLC 39083723
- Chapman, Ivan D. (1975), Iven G. Mackay: Citizen and Soldier, Malvern, Victoria: Melway Publishing, ISBN 0-909439-02-8, OCLC 2346434
- Gwyer, J. M. A. (1964), Grand Strategy, History of the Second World War, United Kingdom Military Series III, London: Her Majesty's Stationery Office, OCLC 3321795
- Hasluck, Paul (1952), The Government and the People, 1939–1941 (PDF), Australia in the War of 1939–1945 I, Canberra: Australian War Memorial, OCLC 3463225, retrieved 18 October 2009
- Herington, John (1954), Air War Against Germany and Italy, 1939–1943 (PDF), Australia in the War of 1939–1945 III, Canberra: Australian War Memorial, OCLC 3633363, retrieved 18 October 2009
- Italy (1979), La prima offensiva britannica in Africa settentrionale (ottobre 1940 – febbraio 1941) (in Italian), Rome: Esercito. Corpo di stato maggiore. Ufficio storico., OCLC 6863876
- Long, Gavin (1952), To Benghazi (PDF), Australia in the War of 1939–1945, Canberra: Australian War Memorial, OCLC 18400892, retrieved 24 September 2009
- Loughnan, R. J. M. (1963), "The Capture of Bardia", Divisional Cavalry, New Zealand in the Second World War, Wellington, New Zealand: War History Branch, New Zealand Department of Internal Affairs, pp. 149–168, OCLC 195420
- Packenham-Walsh, R. P. (1958), History of the Corps of Royal Engineers (1938–1948) VIII, Chatham, Kent: Institution of Royal Engineers, OCLC 59437245
- Playfair, Major-General I. S. O.; Stitt, Commander G. M. S.; Molony, Brigadier C. J. C.; Toomer, Air Vice-Marshal S. E. (1954), Butler, J. R. M., ed., The Mediterranean and Middle East: The Early Successes Against Italy (to May 1941), History of the Second World War, United Kingdom Military Series I, London: Her Majesty's Stationery Office, OCLC 59086236
- Pratten, Garth (2009), Australian Battalion Commanders in the Second World War, Port Melbourne, Victoria: Cambridge University Press, ISBN 978-0-521-76345-5, OCLC 271869976
- Schreiber, Gerhard; Stegemann, Bernd; Vogel, Detlef (1995), The Mediterranean, South-East Europe and North Africa 1939–1941, Germany and the Second World War. 1939–1941 III, Oxford: Clarendon Press, ISBN 0-19-822884-8, OCLC 468817471
- Stockings, Craig (2009), Bardia: Myth, Reality and the Heirs of Anzac, Sydney: UNSW Press, ISBN 978-1-921410-25-3, OCLC 298612750
- Stockings, Craig (2010). "The Anzac Legend and the Battle of Bardia". War in History 17 (1): 86–112. ISSN 1477-0385.
- Wavell, Archibald (13 June 1946), Operations in the Middle East from August, 1939 to November, 1940, Wavell's Official Despatches The London Gazette: (Supplement) no. 37609. pp. 2997–3006. 13 June 1946.
- Wavell, Archibald (25 June 1946), Operations in the Middle East from 7th December, 1940 to 7th February, 1941, Wavell's Official Despatches The London Gazette: (Supplement) no. 37628. pp. 3261–3269. 25 June 1946.
