2/14th Battalion (Australia)
| 2/14th Battalion | |
|---|---|
|
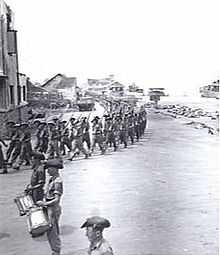
2/14th Battalion personnel training on the Atherton Tablelands, September 1944 | |
| Active | 1940–1946 |
| Country |
|
| Branch | Australian Army |
| Type | Infantry |
| Size | ~800–900 personnel[Note 1] |
| Part of | 21st Brigade, 7th Division |
| Engagements |
|
| Commanders | |
| Notable commanders | Ralph Honner |
| Insignia | |
| Unit Colour Patch |
 |
The 2/14th Battalion was an infantry battalion of the Australian Army, which served during World War II. Part of the 21st Brigade, 7th Division, the battalion saw action against the Vichy French in Syria in 1941 before returning to Australia in early 1942. They subsequently fought against the Japanese along the Kokoda Track and at Gona during the early part of the New Guinea campaign. Later, in 1943, they took part in the advance on Lae before being employed in the Finisterre Range campaign. The battalion's final involvement in the war came in 1945 when they took part in landing on Balikpapan. Following the end of the war, the 2/14th was disbanded in early 1946.
History
Formation
The 2/14th Battalion was raised on 26 April 1940 at Puckapunyal, Victoria,[2] shortly after the start of World War II as part of the Second Australian Imperial Force (2nd AIF), which was established at the time from personnel that had volunteered to serve in combat overseas.[3] Upon raising the battalion was assigned to the 21st Brigade, 7th Division.[2] It would remain part of this formation throughout its existence.[4] From the outset most of the battalion's personnel were drawn from the state of Victoria, although some personnel were allocated from other states later as reinforcements. Officially the battalion's average age on formation was 29, although the battalion historian, William Russell, asserts that this is not necessarily accurate as men were found to have altered their ages both up and down upon recruitment. As a result, it is believed that the youngest soldier to serve in the battalion was 15, while the oldest was 55 upon enlistment.[5] In keeping with the nature in which recruitment for the 2nd AIF was undertaken at the start of the war, there were many examples of brothers in the earliest intakes of recruits for the battalion; there was even one case of a father and son who served in the same platoon.[6]
Soon after battalion headquarters was established, the battalion's first commanding officer, Lieutenant Colonel William Cannon,[7] began choosing his officers, who then set about the task of forming their own companies and platoons. Once the battalion's complement of men had arrived at Puckapunyal and formation was complete, basic training began in May 1940.[8] On 18 August the battalion was presented its Regimental Battle Flag in a ceremony by members of the 14th Battalion, who had served during World War I.[9] This was done in order to establish links with the units of the First Australian Imperial Force, and later, in early October, the 2/14th Battalion changed its Unit Colour Patch to incorporate the yellow and blue of its earlier counterpart.[10] Shortly after this, although still only partially trained, the battalion received orders to deploy overseas and on 18 October they embarked upon the Aquitania in Sydney, New South Wales, bound for the Middle East.[8][11]
Middle East
Travelling via India, the battalion arrived at Kantara, in Egypt on 25 November 1940 and were transported to Julius Camp in Palestine,[12][13] where they undertook further training.[2] Later, they were moved to Dimra in January 1941,[14] before being sent in April to Mersa Matruh, in Egypt, to defend against a possible German attack there during the Siege of Tobruk.[15] Although no German attack came there, during their time at Maaten Bagush they were subjected to aerial attack. They remained there until the end of May when the battalion was relieved by a South African battalion.[16] The 21st Brigade then returned to Palestine to begin preparations for operations in Syria and Lebanon against the Vichy French in order to prevent the area from falling into the hands of the Germans who could then have launched an attack on the Suez Canal from there, or captured the oilfields in Persia (present-day Iran).[17]
The 2/14th Battalion's involvement in the Syria-Lebanon campaign began on the night of 7/8 June when they advanced across the Palestine border from Hanita and attacked Vichy outposts around the village of Alma Chaab.[18] Following this, they advanced along the coast towards Tyre, from where they evicted the French defenders before forcing a crossing over the Litani River.[19] On 11 June, the 21st Brigade's advance towards Sidon came up against determined resistance around the Zahrani River, at Merdjayoun. The 2/14th Battalion found themselves up against troops from the French Foreign Legion. For the next few days they came under attack from Vichy French aircraft and artillery before being committed to a flanking action on 15 June. Conducting a 30-kilometre (19 mi) march during the heat of the day, they approached Sidon through the mountains but arrived just after the town fell to the 2/27th Battalion.[20]
Following this, on 17 June,[20] the battalion was moved to the central sector of the Allied advance in order to reinforce the 2/31st Battalion, attached to the 25th Brigade, which was holding off a Vichy French counterattack at Jezzine.[2] After Damascus was captured on 22 June, the 2/14th Battalion was committed to the fighting to secure a number of features on Mount Kharatt, high ground north-east of the town which dominated the surrounding area.[21] These attacks proved unsuccessful, and quite costly for the 2/14th, with 12 killed and 47 wounded on 24 June.[22] The fighting around Jezzine continued until 29 June when the French began to withdraw.[23] After this, the Australians regained the initiative and on 2 July the 2/14th Battalion left Jezzine to begin preparations for the Battle of Damour, to which they were committed on 5 July 1942.[24] Between then and 9 July, the 2/14th were involved in a number of attacks, capturing French positions on Hills 243 and 567.[25]
On 12 July, an armistice came into effect, ending the fighting.[26] Following this, the 2/14th Battalion was initially used to conduct battlefield clearance tasks before moving to Beirut where they were used as garrison troops overseeing the repatriation of captured Vichy soldiers to France.[27] Later, in September, the battalion was transferred to the north to construct defensive positions near Tripoli in Lebanon.[28] In December 1941, following the Japanese attacks on Pearl Harbor and in Malaya, the decision was made to bring the 6th and 7th Divisions back to Australia. In early January 1942, the 7th Division left Syria, where they had been undertaking garrison duties, and returned to Palestine.[29] The 2/14th were moved to a camp near Jerusalem, and during this time command of the battalion passed to Lieutenant Colonel Arthur Key, who had previously commanded the 2/8th Battalion.[30] On 30 January 1942 the 2/14th Battalion embarked on the transport Ile de France from Port Tewfik in Egypt, bound for Australia.[31]
New Guinea
Kokoda
The battalion returned to Australia via Bombay, where they were transferred to the troopship City of Paris in early February. They arrived in Adelaide, South Australia, on 24 March 1942.[2] After this they undertook defensive duties and training around Yandina, Queensland,[32] before being dispatched along with the rest of the 7th Division to New Guinea where the situation on the Kokoda Track was becoming critical for the Australians as the Japanese advanced towards Port Moresby.[33]
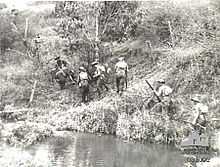
On 13 August 1942, the 21st Brigade, including the 2/14th Battalion, disembarked in Port Moresby.[2][33] Three days later, 16 August, the battalion was transported on trucks to Ilolo before marching to Uberi, reaching Myola on 21 August.[34] On 25 August, the battalion received orders to relieve the severely depleted 39th Battalion, which was holding the Japanese at Isurava. Due to a shortage of supplies it was only possible for one company to move at a time, and as a result 'C' Company was dispatched to Isurava first,[35] while 'B' and 'D' Companies were dispatched to Alola and 'A' Company moved to Templeton's Crossing.[36] 'C' Company subsequently reached the 39th's position late in the evening of 26 August.[37]

The following day, the Japanese launched a fresh offensive with three battalions from the 144th Infantry Regiment,[36] and throughout the day a number of minor engagements took place. On 27 August, the Japanese offensive began in earnest as the 39th Battalion's positions around Isurava were subjected to heavy mortar and artillery fire. Japanese infantry broke into the position through the gaps between one of company's depleted platoons, however, the situation was restored by two Australian counterattacks.[38]
The rest of the 2/14th Battalion arrived on 28 August amidst continuing fighting, bringing with them a 3-inch (76 mm) mortar for indirect fire support.[39] The 39th Battalion then moved to the rear, but remained in support of the 2/14th in order to help repel the next wave of the Japanese attack. By 29 August, the Japanese had about six battalions around Isurava[39] and in the morning fresh attacks succeeded in breaking into the 2/14th's position with 'C' Company, on the battalion's right, being forced to give ground.[38] With the situation critical, the Australians launched a counterattack. As a part of this attack, Private Bruce Kingsbury charged the Japanese, firing his Bren light machine gun from the hip, killing at least 30 of them and forcing others to withdraw. Although Kingsbury was subsequently killed by a sniper, his actions allowed the Australians to briefly regain their positions and later he was posthumously awarded the Victoria Cross, Australia's highest military decoration. Further attacks during the day, however, forced the battalion to fall back 1 kilometre (0.62 mi) down the track.[38]
On 30 August the Japanese began threatening the 2/14th's left flank from the high ground situated there, and as another attack put the battalion's rear in jeopardy, they were forced to give more ground. At this point, the brigade commander, Brigadier Arnold Potts, authorised a withdrawal to Alola.[39] With the Japanese pressing against their rear guard, over the course of the following fortnight, the battalion fought a series of delaying actions and fighting withdrawals towards Ioribaiwa and Imita Ridge. By the time they reached Imita Ridge, the 2/14th was so depleted that it was amalgamated with the 2/16th Battalion to form a composite battalion of just over 300 men,[40] and as the 21st Brigade prepared to make a final stand, the battalions of the 25th Brigade arrived to relieve them.[41][42]
Following this, the composite battalion was withdrawn from the line on 16 September. The 2/14th Battalion had begun the Kokoda campaign with 546 men, but the upon arriving at Uberi, where they had been placed in reserve, they only had 88 men available, of whom only three were officers.[43]
Gona
By November 1942, although the 2/14th had been reformed at Koitaki, near Port Moresby, it was still not up to full strength, with a total of only 341 men of all ranks.[44] Nevertheless, the situation in New Guinea meant that the 21st Brigade was needed to help capture the Japanese beachhead around Gona on the north-eastern coast.[45] The 2/14th Battalion, under the command of Lieutenant Colonel Hugh Challen who had replaced Key in late September,[46] was placed in the vanguard of the brigade's move, being air transported to Popondetta on 25 November.[47]
Organised into three half-strength companies, the following day they began the 32-kilometre (20 mi) march towards Gona and on 29 November the battalion attacked along the coast to the east of Gona. The Japanese positions were well-concealed and amidst strong resistance the 2/14th suffered heavy casualties, losing 13 killed and 23 wounded.[48] Early in the morning on 30 November the battalion lost another three killed before they launched a well-planned deliberate attack on the remaining Japanese fortified position. For only two minor casualties, they forced the Japanese defenders to abandon their positions and managed to break through to the beach, securing about 1.5 kilometres (0.93 mi) along the coast.[49]
On 8 December, a reinforced platoon from the 2/14th was ordered to conduct a reconnaissance around Haddy's Village, 2 kilometres (1.2 mi) west of Gona, where the Japanese had landed reinforcements on 6 December. Under the command of Lieutenant Bob Dougherty, the platoon launched a surprise attack against the numerically superior force. In the hand-to-hand fighting that followed over 90 Japanese were killed or wounded, while six men from the 2/14th were wounded. The attack proved a success and enabled the Australians around Gona to attack without concern about being engaged by the Japanese reinforcements. Gona was subsequently taken on 9 December. Dougherty, who was recommended for the Victoria Cross for his actions, was killed leading a patrol around the village on 11 December.[50]
Following this, the battalion remained in the area until 8 January 1943, by which time they had only 21 fit personnel left. They were subsequently returned to Australia.[2]
Lae and the Finisterres
By the time that the 21st Brigade arrived back in Australia, they were heavily depleted, with only 44 per cent of its authorised strength.[51] They subsequently underwent a period of rebuilding around Ravenshoe, in Queensland, in preparation for further operations.[52] During this time the units of the 7th Division were converted to the "jungle" divisional establishment, which saw a reduction in the 2/14th Battalion's authorised strength to just over 800 men.[1][53] As the battalion was brought back up to strength, in July there was a change of command. On 5 July, Lieutenant Colonel Ralph Honner, who had previously commanded the 39th Battalion during the fighting on the Kokoda Track, replaced Challen as commanding officer.[54]
In August,[2] along with the rest of the 21st Brigade the battalion moved to Port Moresby where they undertook training for the next month in preparation for the Salamaua–Lae campaign. However, the battalion was destined to only take a limited role in the campaign, and on 15 September it was dispatched to the airfields at Nadzab to relieve the US Army's 503rd Parachute Infantry Regiment and defend the vital airfields from possible Japanese attack.[55]
After this, the 2/14th was committed to the advance into the Markham Valley and Finisterre Range, in the vanguard of the 21st Brigade's advance from Kaiapit to Dumpu in late September to early October.[2] Moving through the 2/16th Battalion's position and advancing on to Marawasa, the 2/14th left the Markham Valley and proceeded into the Ramu.[56] From then they moved on the 2/16th's right flank, protecting it from any Japanese attacks that might have eventuated from the north. On 4 October 1943 they reached Wampun village. It was there that the battalion's commanding officer, Honner, was seriously wounded when he moved beyond the main defensive position in order to personally carry out a reconnaissance of the surrounding area.[56] Captain Ian Hamilton, commander of 'C' Company,[57] took over as acting commander briefly until Major Mert Lee arrived from brigade headquarters.[58] Lee remained in acting command until the battalion second-in-command, Major Phillip Rhoden, returned from a staff course to officially take over command of the battalion as a lieutenant colonel in December.[54]
Before being withdrawn back to Australia in March 1944,[2] the battalion was mainly involved in patrol operations in support of the 21st Brigade's advance up the Faria River to capture the Japanese positions on the Kankiryo Saddle.[59] As a part of this effort, the battalion's most significant engagement came on 11 October 1943 when 9 Platoon, under Lieutenant Noel Pallier, destroyed a Japanese company when they captured a ridge that overlooked the valley.[60] Although there were only limited engagements with the Japanese during the four months that the 2/14th were involved in the campaign, the battalion still suffered heavily with 958 men being evacuated due to illness or injury during this time. Of these, four died and a further 546 were permanently removed from the theatre.[61] In contrast, battle casualties during this time amounted to seven killed in action, three died of wounds and 25 wounded.[62]
Borneo
After being withdrawn back to Australia in March, the units of the 7th Division received six weeks leave before reforming on the Atherton Tablelands in Queensland.[63] Following this the 2/14th Battalion undertook a period of training before finally being committed to their last campaign of the war in mid-1945. This campaign saw them take part in the amphibious landings at Balikpapan on 1 July 1945.[64]
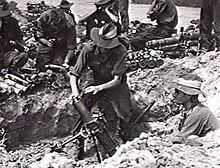
During the initial landings early on 1 July, the 2/14th came ashore at the wrong place, landing at Yellow Beach when they had been scheduled to land at Green Beach.[65] Nevertheless, the landing was largely unopposed and after 45 minutes of reorganisation they were able to establish themselves at their correct form up point and begin the advance to their first objective: the bridge over the Klandasan Besar. Advancing unopposed they crossed the bridge and at nightfall dug-in in front of the Stalkudo ridge, along the Vasey Highway.[65] The following day, the battalion captured the Sepinggang airstrip as the 21st Brigade began the advance to the east.[66][67] The 2/27th Battalion subsequently relieved the 2/14th at Sepinggang and on 3 July, the battalion began to move towards the Manggar strip. The 21st Brigade then came up against stronger opposition near the Batakan Ketjil River,[68] which held them up until the evening.[69]
The following day the 2/14th resumed its advance towards Manggar and after crossing the river and beginning to move across the strip the battalion's lead company began to receive artillery fire from Japanese coastal defence guns.[70] Naval gunfire support was called in to provide counter-battery fire, but this was only partially effective and the following day air support and tanks were brought it.[68] For the next three days minor infantry actions were undertaken around the periphery of the position while direct and indirect fire support was used to reduce the position, with a view to limiting casualties amongst the infantry.[71] Finally, on 9 July, the battalion attacked the two remaining Japanese positions, which had been named "Frost" and "Brown" by the Australians. Supported by a naval bombardment and Liberator heavy bombers which dropped napalm, two companies from the 2/14th Battalion captured the position where they found over 100 Japanese dead along with a number of artillery pieces including two 120 mm naval guns and four 75 mm high-angle guns, as well as numerous heavy mortars and machine-guns.[72]
This represented the last of the 2/14th Battalion's major combat actions of the war.[2] The 21st Brigade subsequently captured Sambodja and then as the tempo of operations wound down in anticipation of the end of the war, they began conducting patrol operations in the interior, stretching towards the 25th Brigade's area along the Milford Highway.[68]
Disbandment
Following the cessation of hostilities in August 1945, the 2/14th Battalion remained on Borneo until October 1945 when it was moved to Makassar in the Celebes Islands (present-day Sulawesi, Indonesia). They arrived there on 1 October 1945 but shortly thereafter the battalion was transported by sea to Pare-Pare, arriving there on 5 October.[73] While there the battalion undertook garrison duties, guarding Japanese prisoners of war and maintaining administration and law and order until the Dutch were in a position to re-assert colonial rule. Despite the complex political situation, the 2/14th Battalion managed to achieve this without violence and on 5 January 1946 the 50th Battalion, Royal Netherlands East Indies Army, began to arrive to relieve them. This was completed by 17 January.[74] On 22 January 1946 the battalion embarked on HMAS Kanimbla, bound for Australia.[2] Upon arrival in Brisbane, Queensland, the demobilisation process began and the battalion's ranks were quickly reduced. Finally, on 22 February 1946, at Victoria Barracks the final paperwork was signed off and the battalion was disbanded.[75]
During the course of the war, the battalion lost 245 men killed in action or died of wounds, or of illness or accident on active service. A further, 379 men from the 2/14th were wounded in action.[2][Note 2] The vast majority of these casualties came during the fighting around Kokoda where the battalion suffered 248 battle casualties.[62] For their service during the war, members of the 2/14th received the following gallantry and distinguished service decorations: one Victoria Cross, one Order of the British Empire, four Military Crosses, three Distinguished Conduct Medals, 19 Military Medals, one British Empire Medal and 44 Mentions in Despatches.[2][76] One section from the battalion, 7 Section from 9 Platoon, 'A' Company, is believed to be "the most highly decorated section in Australian and British military history".[77] Of the 11 men that were assigned to 7 Section when it was first formed in 1940, one of them received the Victoria Cross, one received a Distinguished Conduct Medal and four received the Military Medal.[77]
Commanders
The following officers served as commanding officer of the 2/14th Battalion:
- Lieutenant Colonel William Cannon (1940–1942);
- Lieutenant Colonel Arthur Key (1942);
- Lieutenant Colonel Hugh Challen (1942–1943);
- Lieutenant Colonel Ralph Honner (1943);
- Lieutenant Colonel Phillip Rhoden (1943–1946).[2][54][78]
Battle honours
The 2/14th Battalion received the following battle honours for its service during the war:
- North Africa, Syria 1941, Syrian Frontier, Adlun, Jezzine, Damour, South-West Pacific 1942–1945, Kokoda Trail, Isurava, Eora Creek–Templeton's Crossing I, Efogi–Menari, Ioribaiwa, Buna–Gona, Gona, Amboga River, Lae–Nadzab, Liberation of Australian New Guinea, Ramu Valley, Shaggy Ridge, Borneo 1945, Balikpapan.[2]
Notes
Footnotes
- ↑ By the start of World War II, the authorised strength of an Australian infantry battalion was 910 men all ranks, however, later in the war it fell to 803.[1]
- ↑ Russell provides the figures of 151 killed in action, 31 missing in action, 25 died of wounds, 19 died of illness and 378 wounded in action.[62]
Citations
- ↑ 1.0 1.1 Palazzo 2004, p. 94.
- ↑ 2.0 2.1 2.2 2.3 2.4 2.5 2.6 2.7 2.8 2.9 2.10 2.11 2.12 2.13 2.14 2.15 "2/14th Battalion". Second World War, 1939–1945 units. Australian War Memorial. Retrieved 18 April 2011.
- ↑ Grey 2008, p. 146.
- ↑ "2/14 Infantry Battalion: Superiors". Orders of Battle.com. Retrieved 18 April 2011.
- ↑ Russell 1948, pp. 3–4.
- ↑ Russell 1948, p. 4.
- ↑ "VX13432 Lieutenant Colonel William George Cannon". Australian War Memorial. Retrieved 18 April 2011.
- ↑ 8.0 8.1 Dornan 1999, p. 26.
- ↑ Russell 1948, p. 18.
- ↑ Russell 1948, p. 13.
- ↑ Russell 1948, p. 14.
- ↑ Dornan 1999, p. 29.
- ↑ Russell 1948, p. 19.
- ↑ Russell 1948, p. 27.
- ↑ Dornan 1999, p. 34.
- ↑ Russell 1948, p. 37.
- ↑ Dornan 1999, p. 38.
- ↑ Dornan 1999, pp. 42–43.
- ↑ Dornan 1999, p. 46.
- ↑ 20.0 20.1 Dornan 1999, p. 48.
- ↑ Dornan 1999, p. 52.
- ↑ Dornan 1999, p. 61.
- ↑ Johnston 2005, p. 66.
- ↑ Dornan 1999, p. 65.
- ↑ Dornan 1999, pp. 68–69.
- ↑ Dornan 1999, p. 70.
- ↑ Dornan 1999, p. 73.
- ↑ Dornan 1999, p. 74.
- ↑ Johnston 2005, p. 77.
- ↑ Dornan 1999, pp. 77–78.
- ↑ Dornan 1999, pp. 78–81.
- ↑ Dornan 1999, pp. 85–86.
- ↑ 33.0 33.1 Keogh 1965, p. 183.
- ↑ Keogh 1965, p. 184.
- ↑ Dornan 1999, pp. 106–107.
- ↑ 36.0 36.1 Keogh 1965, p. 206.
- ↑ McAllester 1990, p. 238.
- ↑ 38.0 38.1 38.2 "Battle of Isurava". Australian War Memorial. Retrieved 19 April 2011.
- ↑ 39.0 39.1 39.2 Keogh 1965, p. 207.
- ↑ Keogh 1965, p. 211.
- ↑ Brune 2004, p. 238.
- ↑ Keogh 1965, p. 215.
- ↑ Dornan 1999, p. 156.
- ↑ Dornan 1999, p. 171.
- ↑ Brune 2004, p. 435.
- ↑ Dornan 1999, p. 174.
- ↑ Keogh 1965, p. 257.
- ↑ Dornan 1999, p. 184.
- ↑ Dornan 1999, pp. 184–185.
- ↑ Dornan 1999, pp. 186–187.
- ↑ Dexter 1961, p. 268.
- ↑ Johnston 2005, p. 163.
- ↑ Johnston 2005, p. 165.
- ↑ 54.0 54.1 54.2 "2/14 Infantry Battalion: Appointments". Orders of Battle.com. Retrieved 18 April 2011.
- ↑ Dexter 1961, p. 385.
- ↑ 56.0 56.1 Bradley 2004, p. 46.
- ↑ Bradley 2004, p. 67.
- ↑ Bradley 2004, p. 69.
- ↑ Keogh 1965, p. 345.
- ↑ Bradley 2004, pp. 66–84.
- ↑ Russell 1948, pp. 252–253.
- ↑ 62.0 62.1 62.2 Russell 1948, p. 321.
- ↑ Johnston 2005, p. 211.
- ↑ Keogh 1965, pp. 461–462.
- ↑ 65.0 65.1 Long 1963, p. 514.
- ↑ Long 1963, p. 520.
- ↑ Keogh 1965, p. 462.
- ↑ 68.0 68.1 68.2 Keogh 1965, p. 463.
- ↑ Long 1963, p. 522.
- ↑ Long 1963, p. 525.
- ↑ Long 1963, p. 527.
- ↑ Long 1963, pp. 529–530.
- ↑ Russell 1948, p. 311.
- ↑ Russell 1948, pp. 315–316.
- ↑ Russell 1948, p. 316.
- ↑ McAllester 1990, pp. 373–375.
- ↑ 77.0 77.1 Dornan 1999, p. 191.
- ↑ McAllester 1990, p. 2.
References
- Bradley, Phillip (2004). On Shaggy Ridge—The Australian Seventh Division in the Ramu Valley: From Kaiapit to the Finisterres. South Melbourne, Victoria: Oxford University Press. ISBN 0-19-555100-1.
- Brune, Peter (2004) [2003]. A Bastard of a Place: The Australians in Papua. Crows Nest, New South Wales: Allen & Unwin. ISBN 978-1-74114-403-1.
- Dexter, David (1961). The New Guinea Offensives. Australia in the War of 1939–1945, Series 1—Army. Volume VII (1st ed.). Canberra, Australian Capital Territory: Australian War Memorial. OCLC 2028994. Archived from the original on 12 May 2011. Retrieved 20 April 2011.
- Dornan, Peter (1999). The Silent Men: Syria to Kokoda and on to Gona. St Leonards, New South Wales: Allen & Unwin. ISBN 1-86448-991-X.
- Grey, Jeffrey (2008). A Military History of Australia (3rd ed.). Melbourne, Victoria: Cambridge University Press. ISBN 978-0-521-69791-0.
- Johnston, Mark (2005). The Silent 7th: An Illustrated History of the 7th Australian Division 1940–46. Crows Nest, New South Wales: Allen & Unwin. ISBN 1-74114-191-5.
- Keogh, Eustace (1965). South West Pacific 1941–45. Melbourne, Victoria: Grayflower Publications. OCLC 7185705.
- Long, Gavin (1963). The Final Campaigns. Australia in the War of 1939–1945, Series 1 – Army, Volume VII. Canberra, Australian Capital Territory: Australian War Memorial. OCLC 1297619. Retrieved 20 April 2011.
- McAllester, James (1990). Men of the 2/14 Battalion. Melbourne, Victoria: 2/14 Battalion Association. ISBN 978-0-7316-8581-3.
- Palazzo, Albert (2004). "Organising for Jungle Warfare". In Dennis, Peter; Grey, Jeffrey. The Foundations of Victory: The Pacific War 1943–1944. Canberra, Australian Capital Territory: Army History Unit. ISBN 978-0-646-43590-9. Retrieved 20 April 2011.
- Russell, William (1948). The Second Fourteenth Battalion: A History of an Australian Infantry Battalion in the Second World War. Sydney, New South Wales: Angus and Robertson. OCLC 12884515.