Taylor-Hobson
Taylor Hobson is an English company founded in 1886 and located in Leicester, initially a manufacturer of camera and cine lenses, now manufacturing precision metrology instruments, in particular, profilometers for the analysis of surface texture and form. Taylor Hobson is now part of Ametek's Ultra Precision Technologies Group.[1]
History
Early history of the company
- 1886 The company is formed by Thomas Smithies Taylor, an optician and his brother Herbert William Taylor, an engineer, to make lenses.[2]
- 1887 W.S.H Hobson joins the company as the sales face of Taylor, Taylor & Hobson ("TTH").
- 1893 The company produces its first Cooke lens. The name Cooke comes to the company TTH after an agreement with Cooke of York who licenses some of their designs to TTH.
- 1914-1918 The Aviar lens developed for aerial photography contributes to the allies air force supremacy.[3]
- 1919 William Taylor is awarded the OBE.
- 1932 TTH produces the first Cooke zoom lens for cine photography.
- 1939 Taylor Hobson supplies over 80% of the world's lenses in film studios.
How Surface Texture Analysis was invented

William Taylor was convinced that to be a leader in optics, he needed to have best understanding and control of the surface quality of his lenses. As a consequence, he started to design instruments capable to help him evaluate surface texture, then roundness. Other manufacturers in various domains saw his instruments and required him to sell the same, which he refused as the invented instruments were strategic to Taylor Hobson's optical lenses supremacy. When eventually the company accepted to sell these, Taylor Hobson had started to become the instrument manufacturer that is known today.
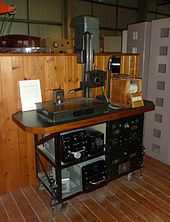
- 1941 Taylor Hobson create the first true surface texture measuring instrument, the TalySurf 1, opening the way to Surface finish analysis.
- 1946 Taylor Hobson becomes part of the Rank Organisation.
- 1949 Taylor Hobson invent the world's first roundness measuring instrument, the Talyrond 1.
Surface texture analysis becomes industrial matter
- 1951 Taylor Hobson develops a micro-alignment telescope.
- 1965 Taylor Hobson introduces the Surtronic range, a handheld roughness meter that is easier to use in the shop floor, thanks to a skid pick-up. The skid pick-up looses the large waves of the surface texture (waviness and form) as the skid follows the general form of the surface, but has the major advantage of allowing the easy assessment of roughness without requiring spending time leveling a datum line to set the sensor in range.
- 1966 Taylor Hobson introduces the TalyStep, that has been a reference during about two decades for the ultra-precise, low contact force measurement of step height with applications in the then raising semiconductor industry.
- 1969 Taylor Hobson acquires the optical company Hilger and Watts.
- 1984 Taylor Hobson introduces the Form Talysurf, that associates a range of several millimeters to a nanometric resolution, opening the way of measuring both roughness and form at the same time.
- 1992 Taylor Hobson receives the Queen's award for technological achievement from the hands of Lord Lieutenant of Leicestershire during an official ceremony.
- 1995 an original small 3D texture, contact scanner, looking like a computer mouse, the TalyScan, is introduced (not to be confused with the TalyScan 150 and 250 introduced later, of a more classical design using slides to move the component and a fix sensor).
- 1996 The Form TalySurf PGI introduces sub-nanometer accuracy using a phase grating interferometer as the height sensor principle as an alternative to inductive pick-ups, but still on a contact pick-up touching the surface, and hence independent of the optical properties of the measured surface (as demonstrates the company early history, this surface can for instance be an optical lens).
- 1996 Schroeder Ventures acquire Taylor Hobson from the Rank Organisation.
- 1996 Taylor Hobson is the first metrology manufacturer to adopt the Mountains software technology from Digital Surf that associates a desk top publishing tool to metrology results issued by instruments. The collaboration allows Taylor Hobson to introduce the TalyMap 3D surface texture analysis software as an option to the TalySurf profilers and the TalyProfile 2D surface texture analysis software as an option to the Surtronic roughness testers.
- 1998 The historical activity of the company, Cooke lenses, leaves Taylor Hobson as buy out that creates the company Cooke Optics.[4]
- 2003 Taylor Hobson introduces their first optical field profiler (i.e. based on a microscope), the TalySurf CCI, as a complement to their existing scanning 3D profilometers based on styli or non-contact single-point sensors.
- 2004 Taylor Hobson becomes part of Ametek's Ultra Precision Technologies Group.
- 2007 The TalyRond 395, a fully automated roundness and cylindricity instrument introduces a new trend of automated, multiple measurements (such as surface texture and roundness) on the same instrument.